


🧬 Introduction
The Password Grant flow is an OAuth2.0 grant type that enables a client application to obtain an access token by presenting the user's username and password directly to the Authorization Server. This flow is considered to be less secure since it requires the client application to handle and transmit the user's credentials.
Therefore, this grant is used in scenarios where the client application is highly trusted, and the user experience is prioritized over security concerns(e.g. Mobile phones). Therefore, it is not recommended for use in public-facing applications or scenarios where sensitive data is involved.
〰️ Password Grant Type

🧪 Testing Password Grant Type with WSO2 IS
First, we need to create a Service Provider/Client in the WSO2 IS. To create a new service provider we can use the DCR we have discussed in the previous article.
Create a new service provider by executing the following cURL command.
curl -k -X POST -H "Authorization: Basic YWRtaW46YWRtaW4=" -H "Content-Type: application/json" -d '{"client_name": "playground_2","grant_types": ["authorization_code","password"], "redirect_uris": ["http://localhost:8080/playground2/oauth2client"],"ext_param_client_id":"provided_client_id0001","ext_param_client_secret":"provided_client_secret0001" }' "https://localhost:9443/api/identity/oauth2/dcr/v1.1/register"
Next, download the Apache Tomcat binary zip file and extract it to a location where you can access it easily on your machine. After that, download the playground2 sample application from WSO2 IS sample releases.
Then put the playground2.war file in the <TOMCAT_HOME>/webapps directory and open a terminal in the <TOMCAT_HOME>/bin directory. Then, run the following commands to extract the playground2.war file.
If permissions are not set
↳
chmod +x catalina.shStart the Tomcat server
↳
./catalina.sh start
After starting the Tomcat server, you will notice there is a directory created in <TOMCAT_HOME>/webapps named playground2. Stop the Tomcat server by typing ./catalina.shstop and go to <TOMCAT_HOME>/webapps/playground2/WEB-INF/classes and open playground2.properties file. Then provide the Client ID and Client Secret for the playground2 app(When we created the Service Provider(SP) using DCR we gave provided_client_id0001 as the Client ID and provided_client_secret0001 as the Client Secret). After that, start the Tomcat server again by typing ./catalina.sh start in the terminal.

If you want to see the logs of the Tomcat server, open another terminal tab and go to <TOMCAT_HOME>/logs and type, tail -1000f catalina.out
Now, you can execute the following cURL command to get the Access Token.
cURL format
↳
curl -v -X POST --basic -u <CLIENT_ID>:<CLIENT_SECRET> -H "Content-Type:application/x-www-form-urlencoded;charset=UTF-8" -k -d "grant_type=password&scope=<SCOPES>&username=<USERNAME>&password=<PASSWORD>"https://localhost:9443/oauth2/tokencURL example
↳
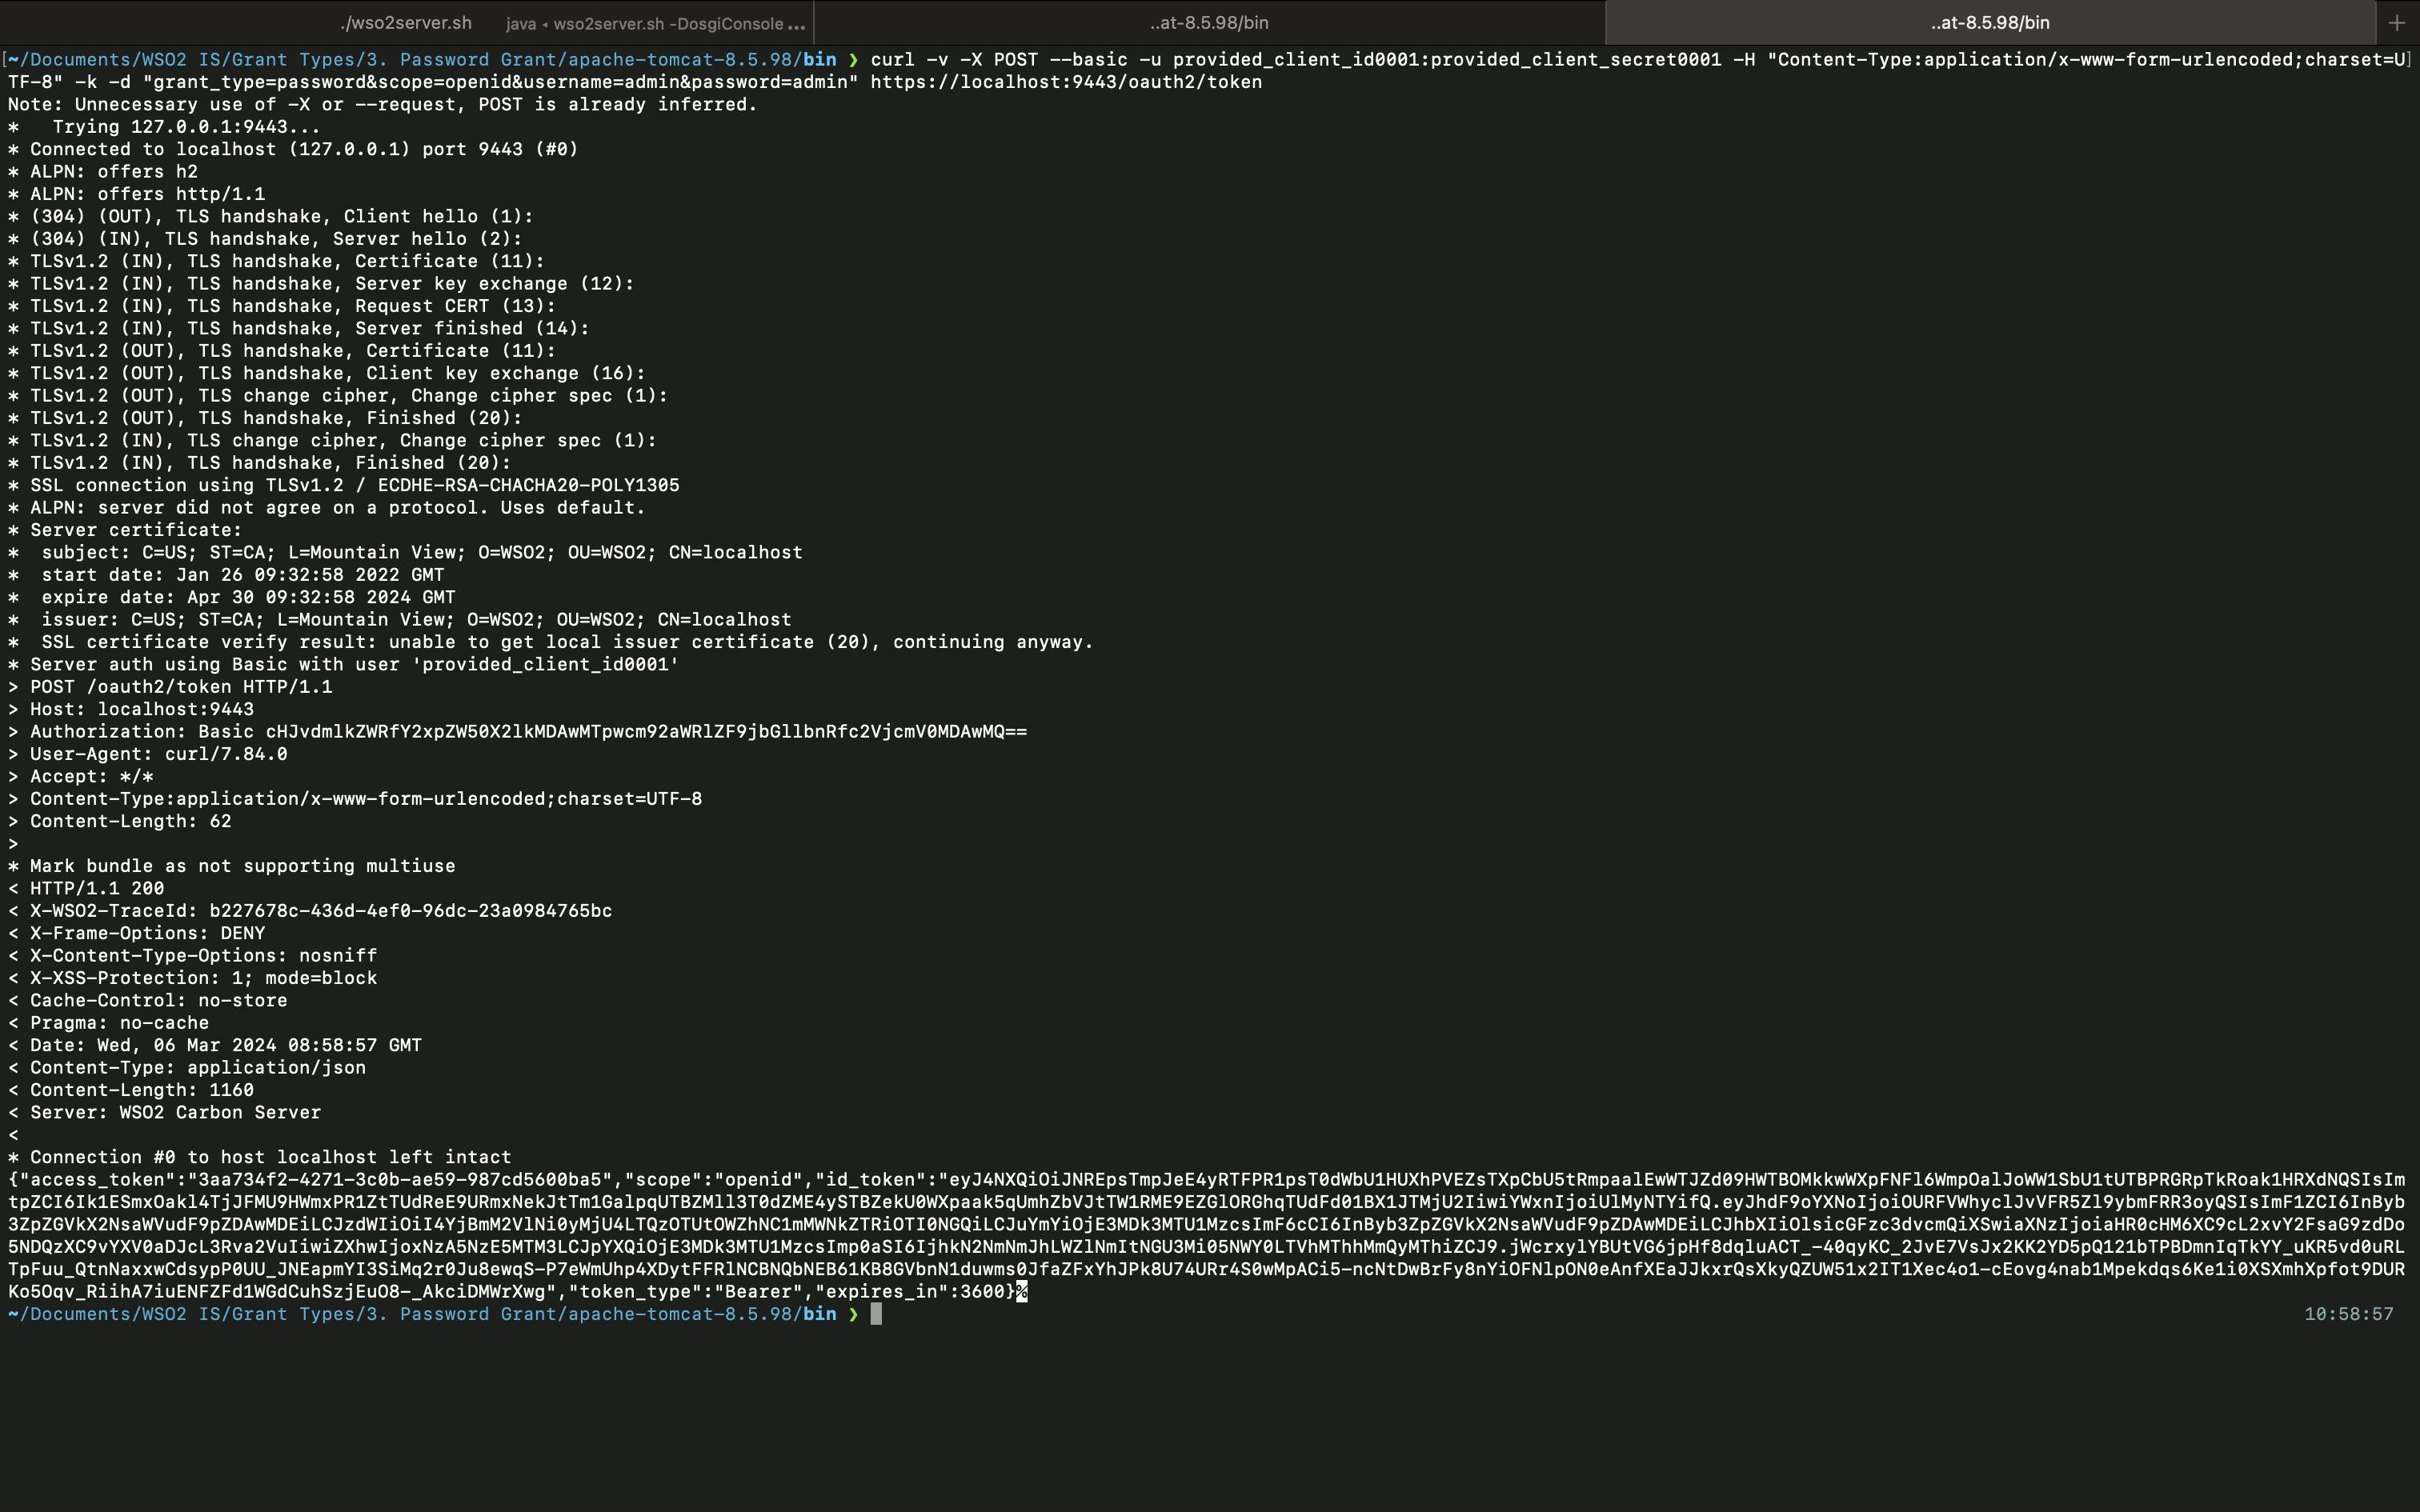
curl -v -X POST --basic -u provided_client_id0001:provided_client_secret0001 -H "Content-Type:application/x-www-form-urlencoded;charset=UTF-8" -k -d "grant_type=password&scope=openid&username=admin&password=admin"https://localhost:9443/oauth2/token
Although we are requesting the /oauth2/token endpoint, we are sending the request to the Authorization Server. Therefore, it will provide both Access and ID Tokens.
Now, you can use this Access Token to obtain user-info, by requesting to /oauth2/userinfo endpoint.
cURL format
↳
curl -k -v -H "Authorization: Bearer <ACCESS_TOKEN>" https://localhost:9443/oauth2/userinfocURL example
↳
curl -k -v -H "Authorization: Bearer 3a81cb8c-e37c-36a1-b005-57a6760d354d" https://localhost:9443/oauth2/userinfo
Then, you can see the following output.

Alternatively, you can put the ID Token in https://jwt.io/ and get the user claim values as well.

As you can see, you are only getting the sub value because we haven't configured what claims should be mapped to the SP and what claims should be mapped to the openid scope. You can check my previous articles on, how to create scopes and claim configuration to understand more about how you can get more claims using the /oauth2/userinfo endpoint.
So this is it about the Password Grant Type. We will check about the Client Credentials Grant Type in the next article.