


Photo by Markus Spiske on Unsplash
OAuth2 and OpenID Connect with WSO2 IS - Part 6
Creating a Custom OIDC Scope


🧬 Introduction
In the previous article, we checked how we can get user claims using existing OIDC scopes and claim configurations. In this article, we will check how to create custom user claims and associate them with a custom scope.
🖲️ Adding a Custom Local Claim
Log in to the WSO2 Management Console and go to Claims → Add. From there, select Add Local Claim.
Let's add a new claim nationality and map it to the existing country claim. Make sure to check on Supported by default so that it will be shown in the user's profile.

Since the mapped attribute is already there as a claim, it will ask for your approval for the new claim. Click on OK to continue.

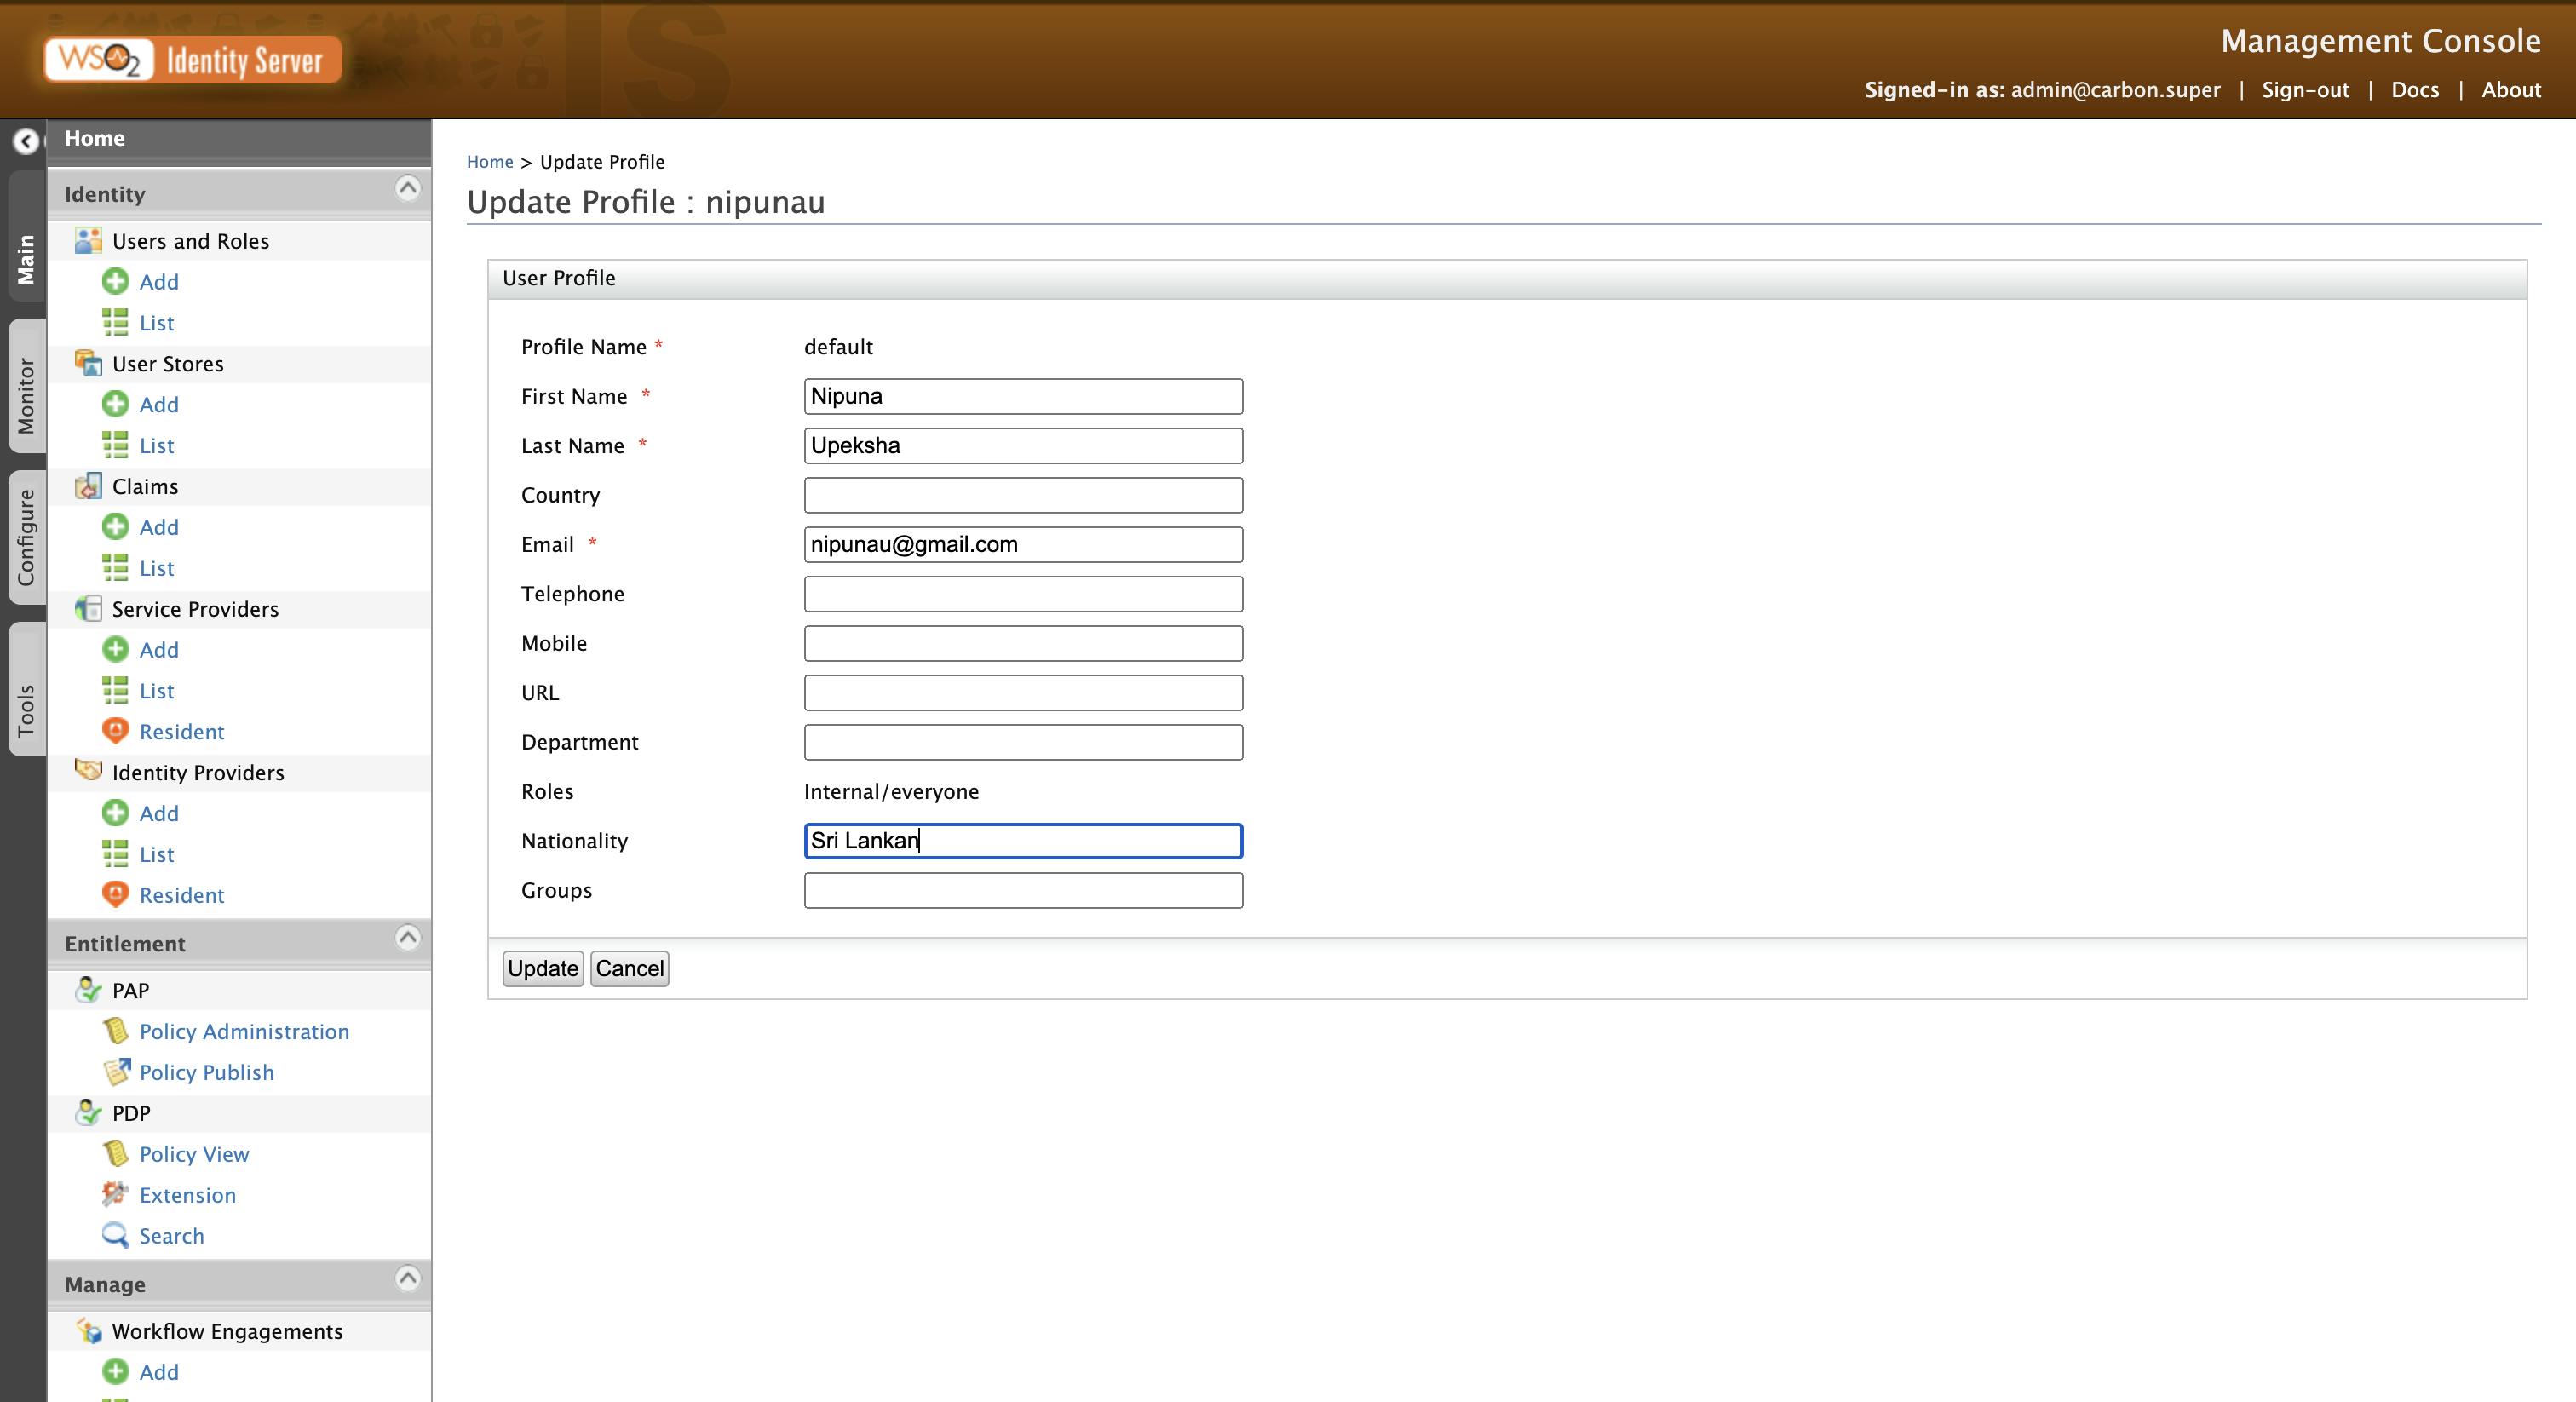
Now let's go to the previously created user's profile and add nationality there. Go to Users and Roles → List → Users and click on the user's user profile. After that, add the nationality of the user and click on Update.
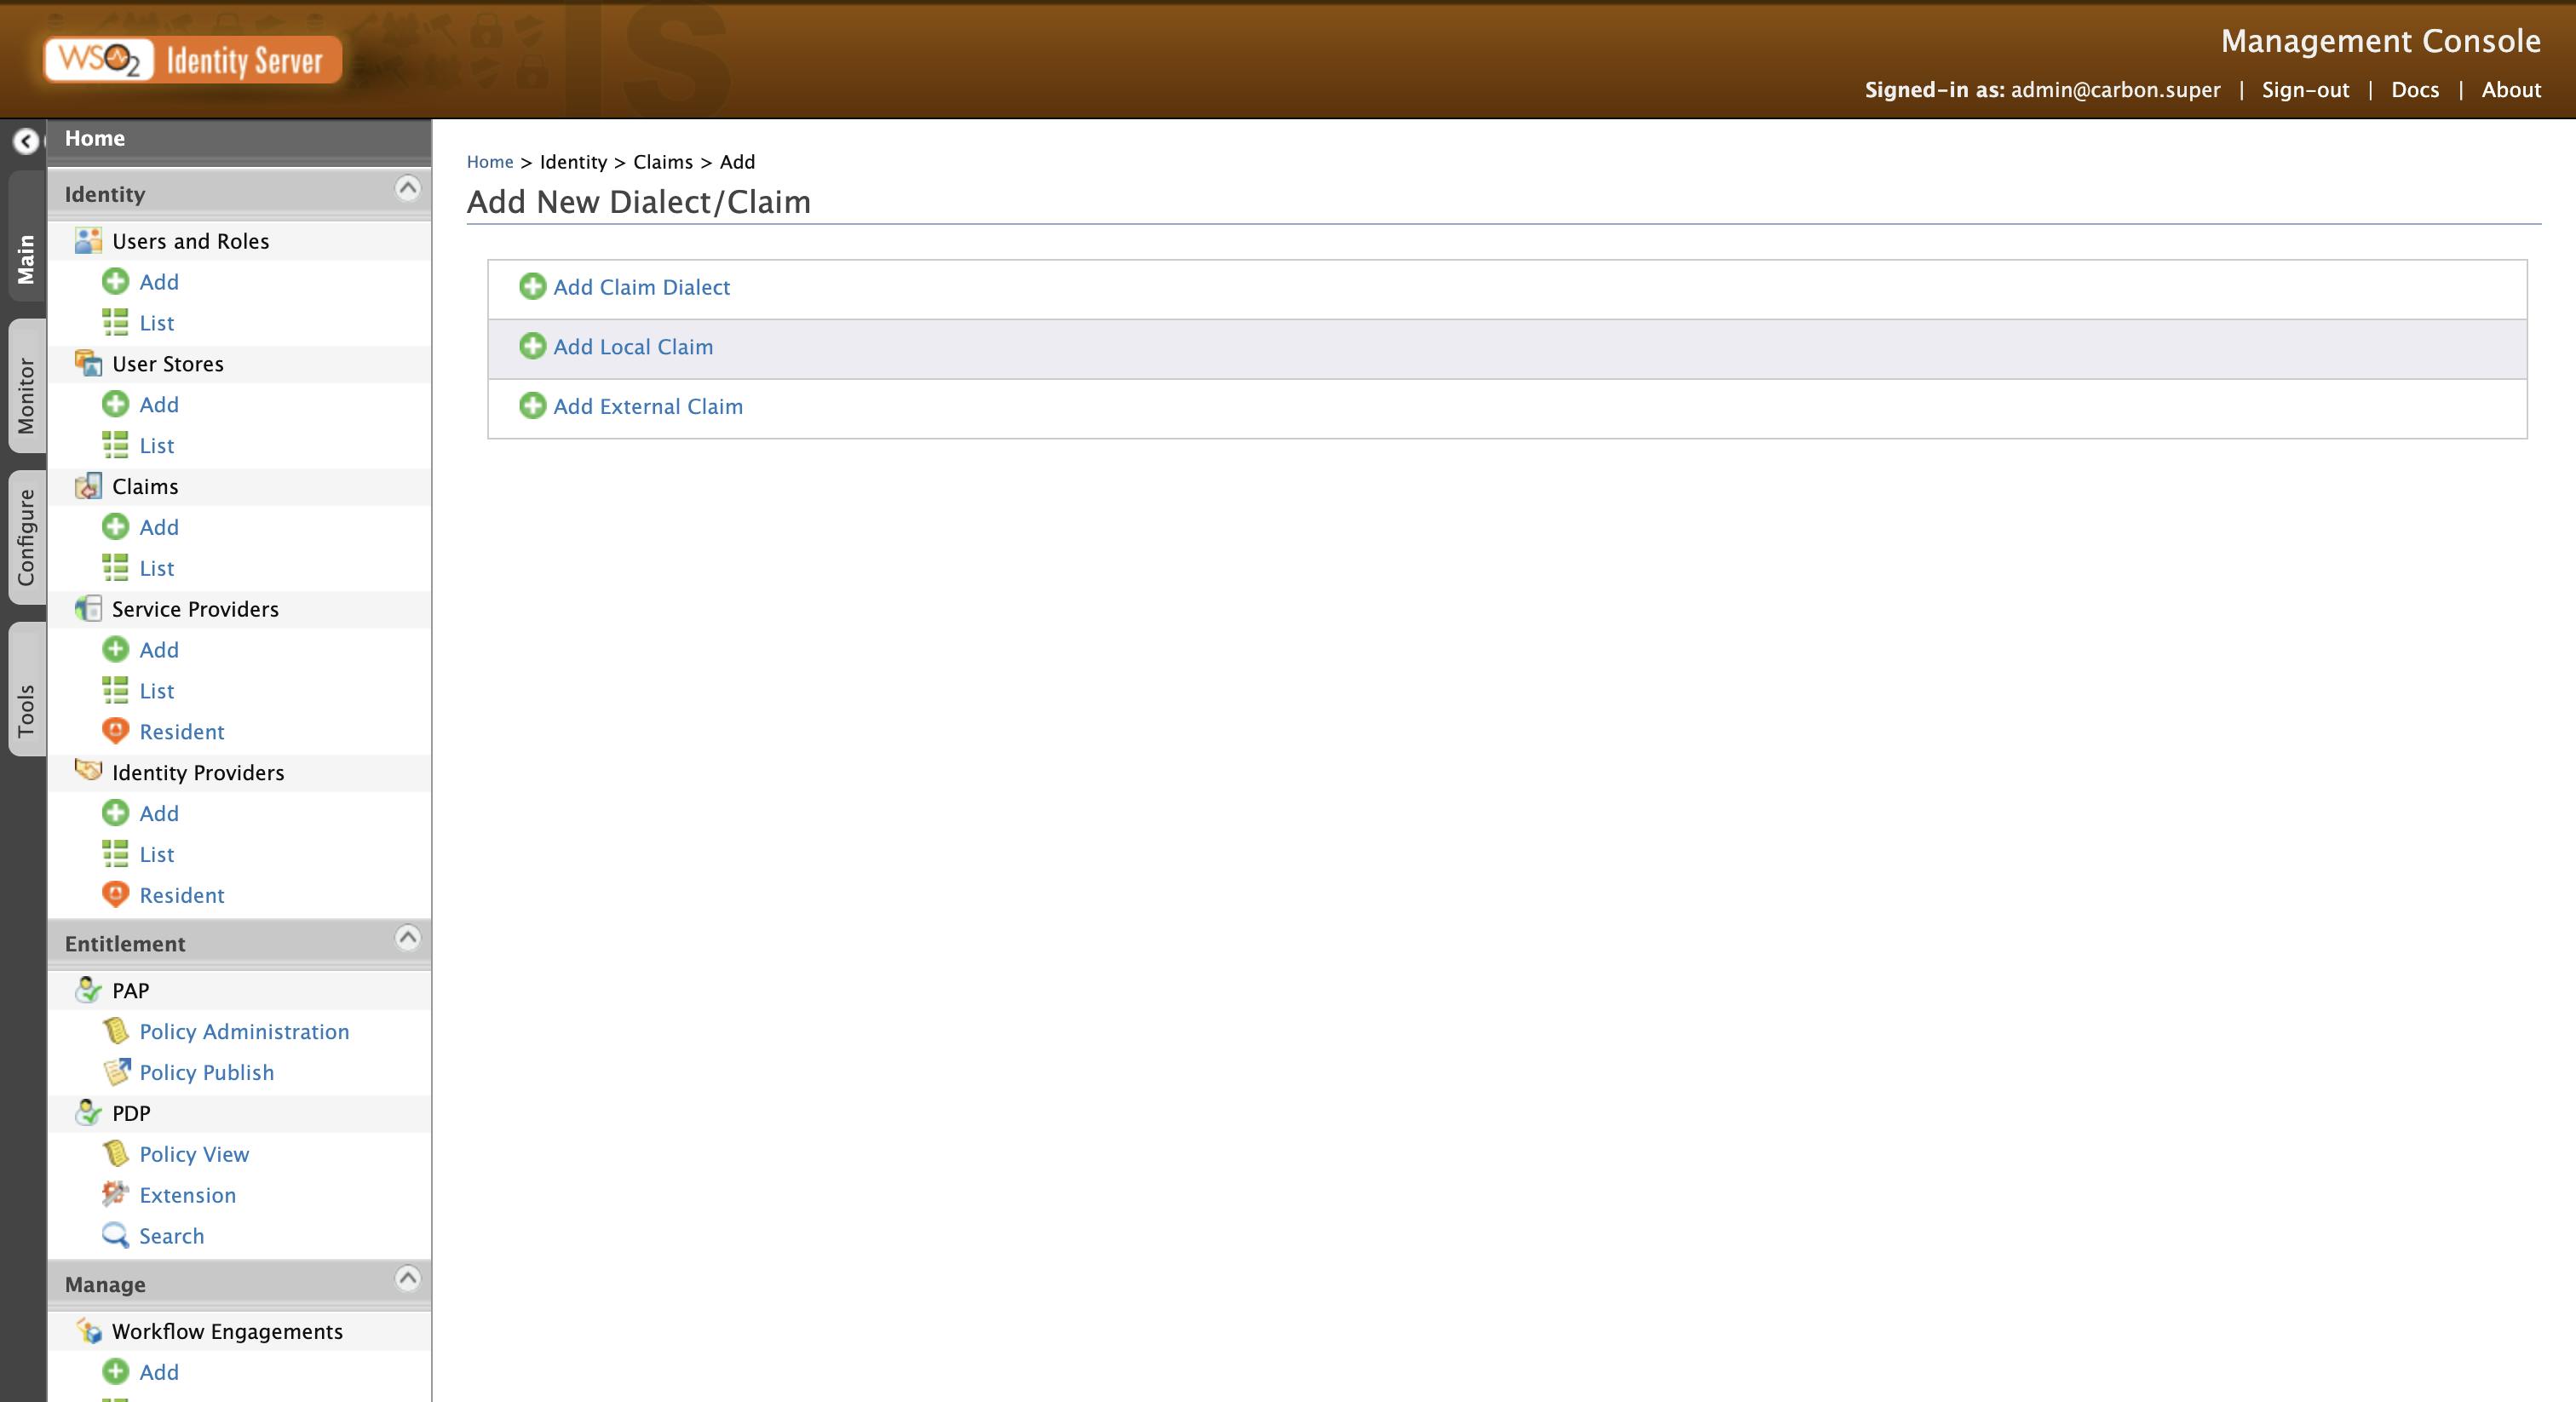
🕹️ Adding a New OIDC Claim
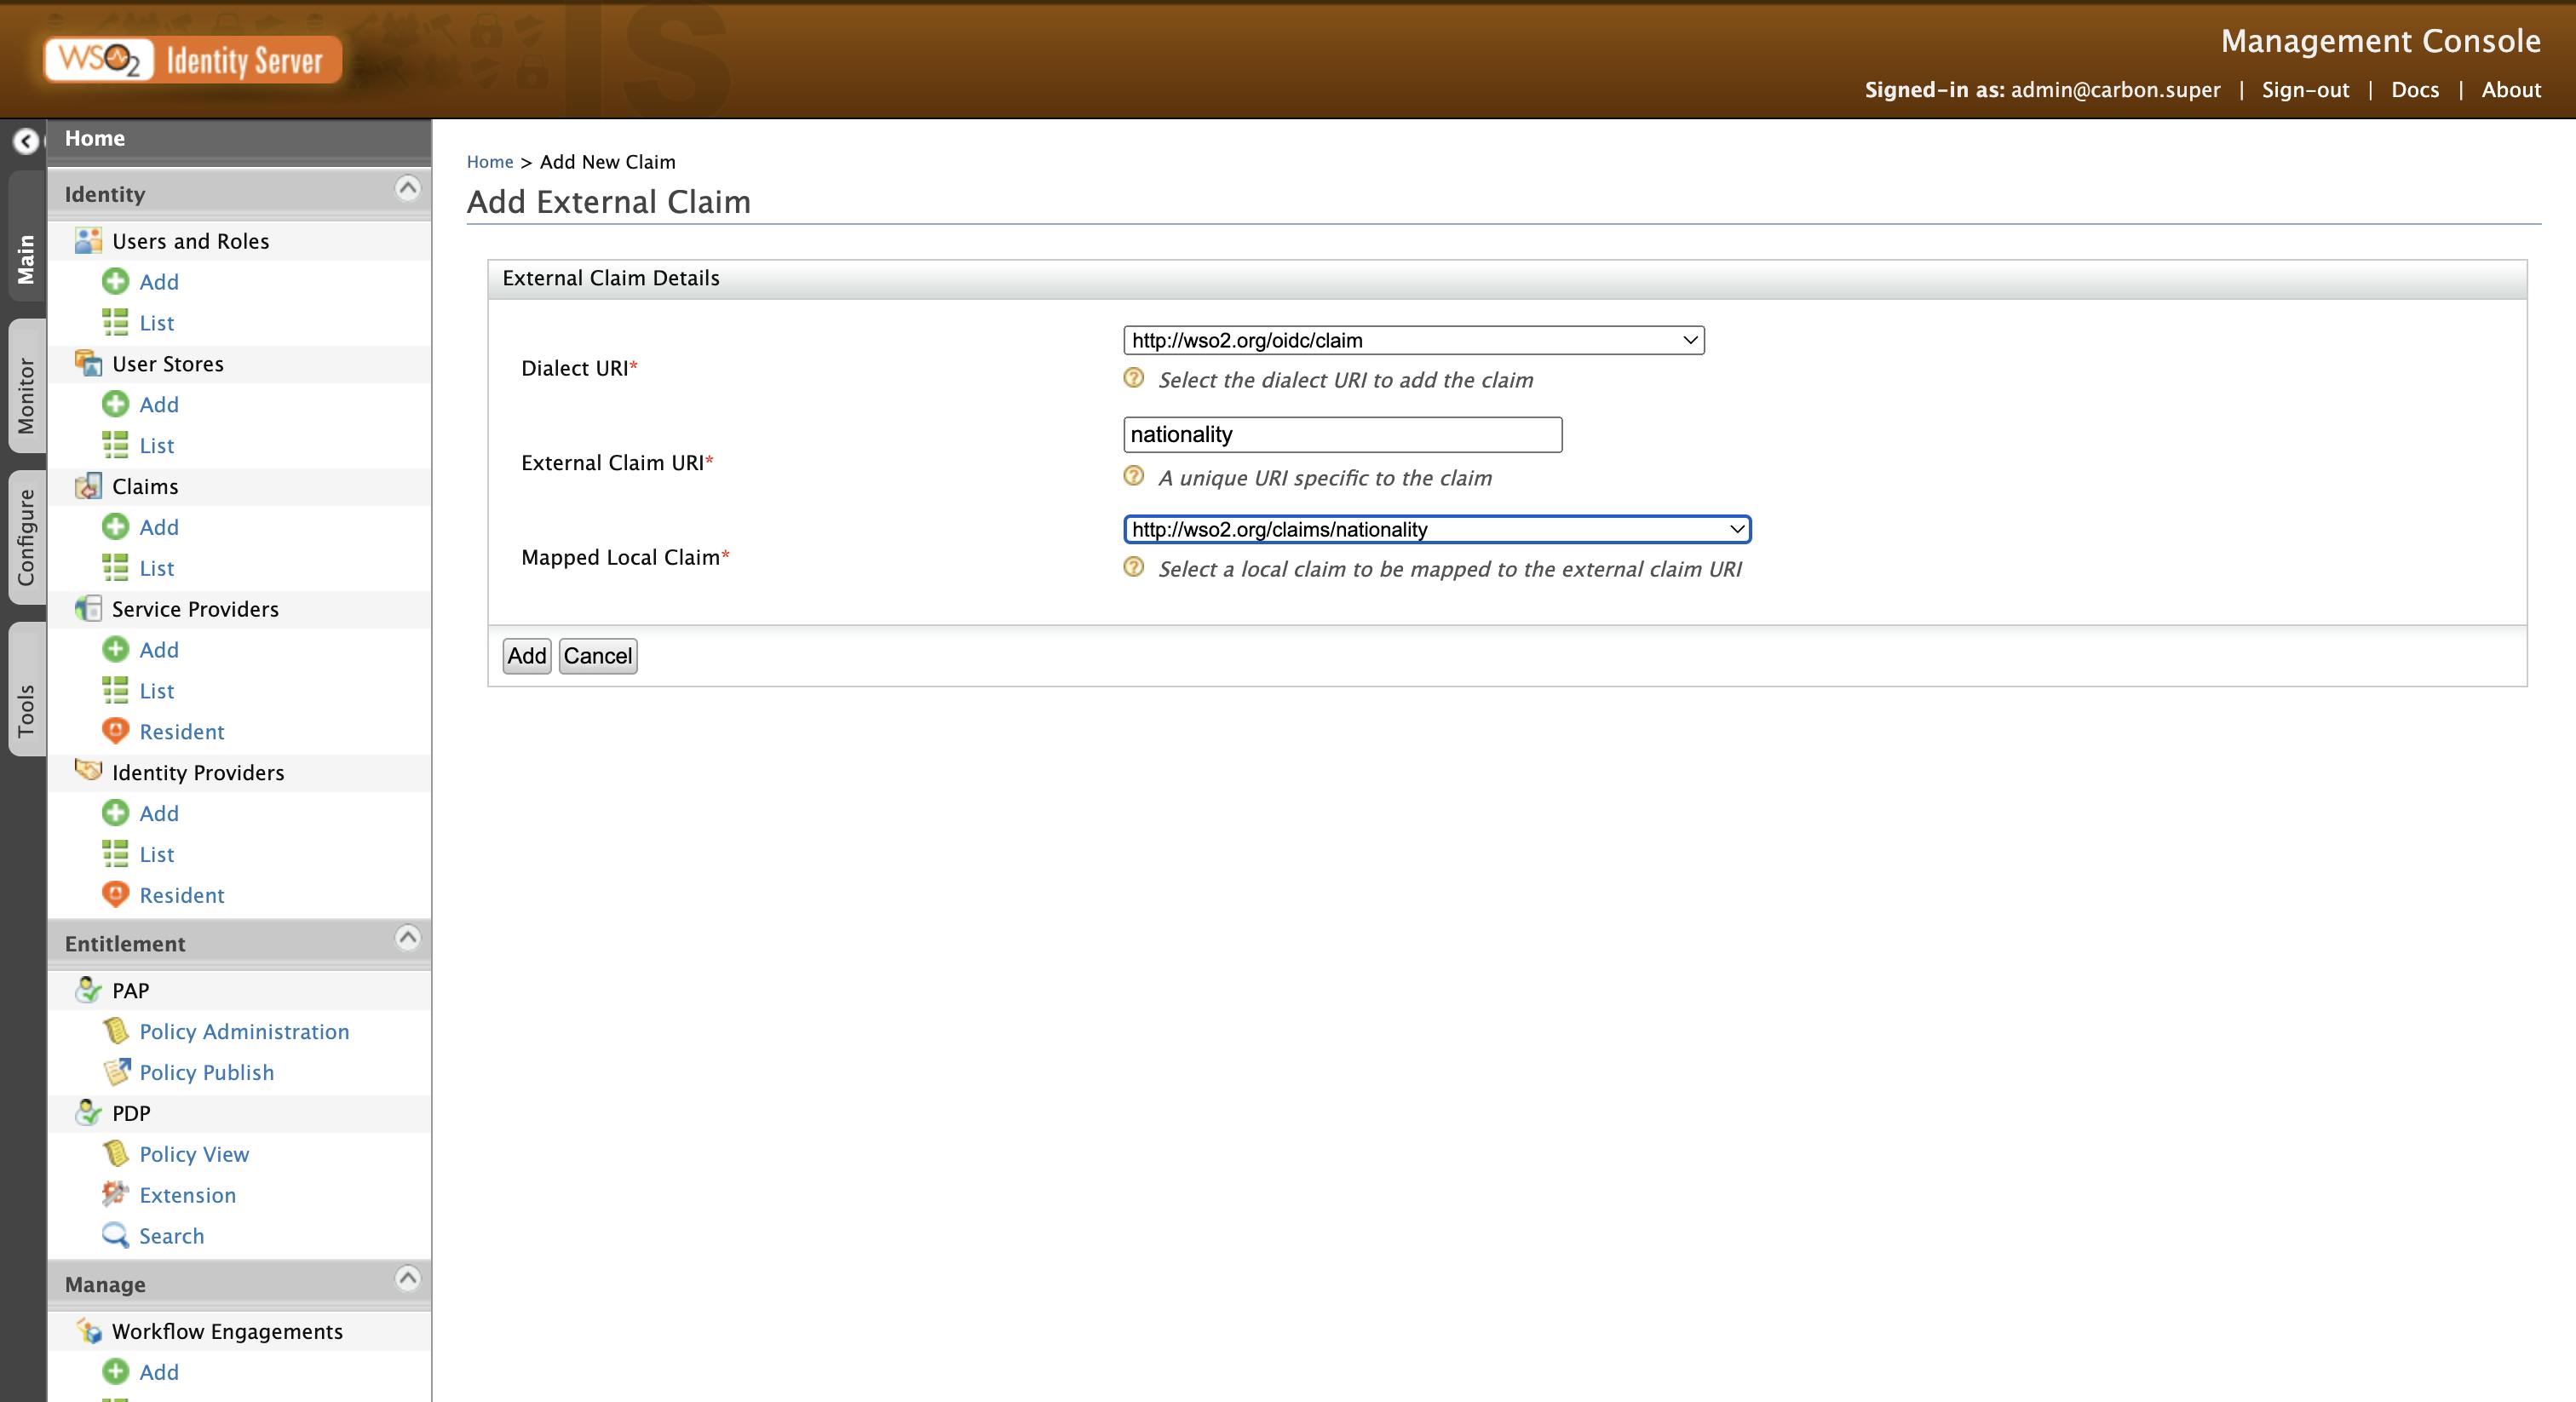
Since the created claim is not in the OIDC claims, we need to add it to the OIDC claim dialect as well. To do that, go to Claims → Add → Add External Claim. Select the http://wso2.org/oidc/claim as the Claim Dialect and http://wso2.org/oidc/claims/nationality as the Mapped Claim.
Now we have an OIDC claim, which can be mapped to our local claim.
🔌 Add Custom Scope for the New Claim
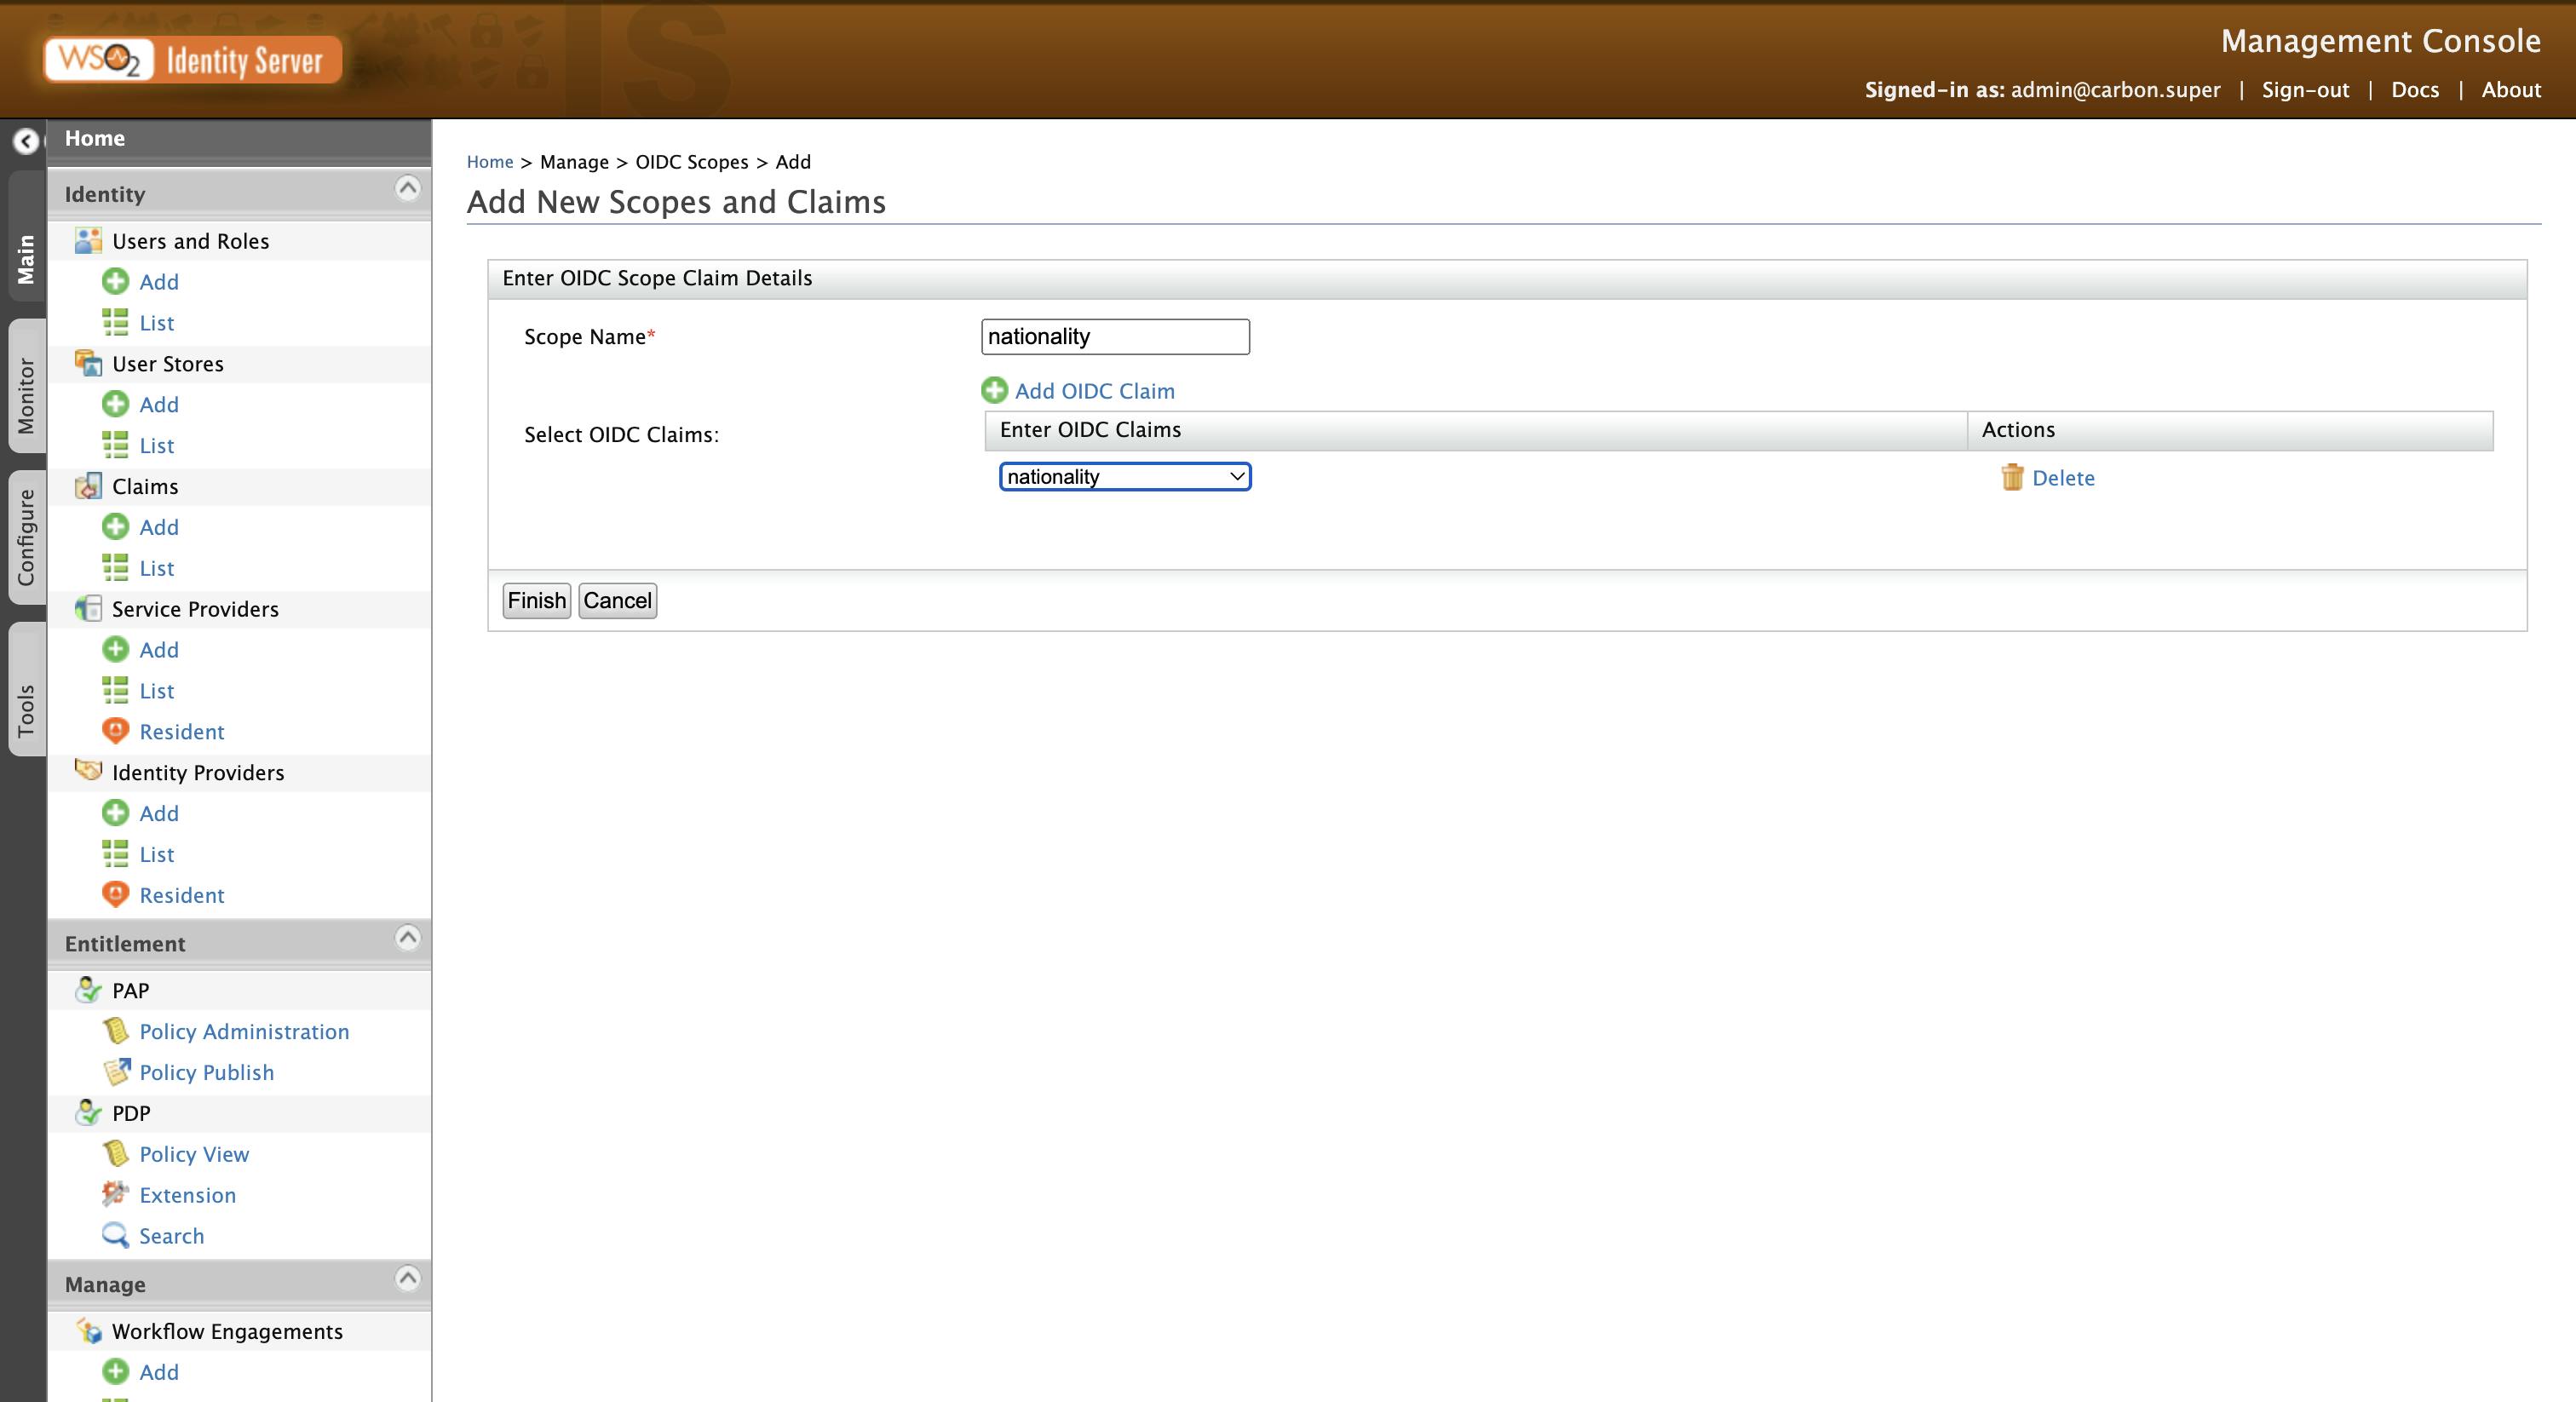
In the previous article, we already checked how you can add a claim to an existing scope. Here, we will check how you can create a new scope and add claims to it. To do that, go to OIDC Scopes → Add in the sidebar to add a new OIDC scope. Give nationality as the Scope Name and add the nationality OIDC claim to it. Finally, click on Finish to create the scope.
⚙️ Configure Claim Mappings in the SP
Next, we need to configure the claim mappings in our SP. To do that, go to the previously created Service Provider(SP) by, Service Providers → List → playground_2 → Claim Configuration. Then add the nationality local claim there. After that click on Update to update the SP configurations.

🧑🏻🔬 Testing the Scope
To test the newly created scope, type the following URL in the browser(We are using the Authorization Code Grant here). Make sure to add the newly created scope nationality as a space-delimited value.
https://localhost:9443/oauth2/authorize?response_type=code&client_id=provided_client_id0001&redirect_uri=http://localhost:8080/playground2/oauth2client&scope=openid nationality
You will be prompted to give consent for the nationality claim.
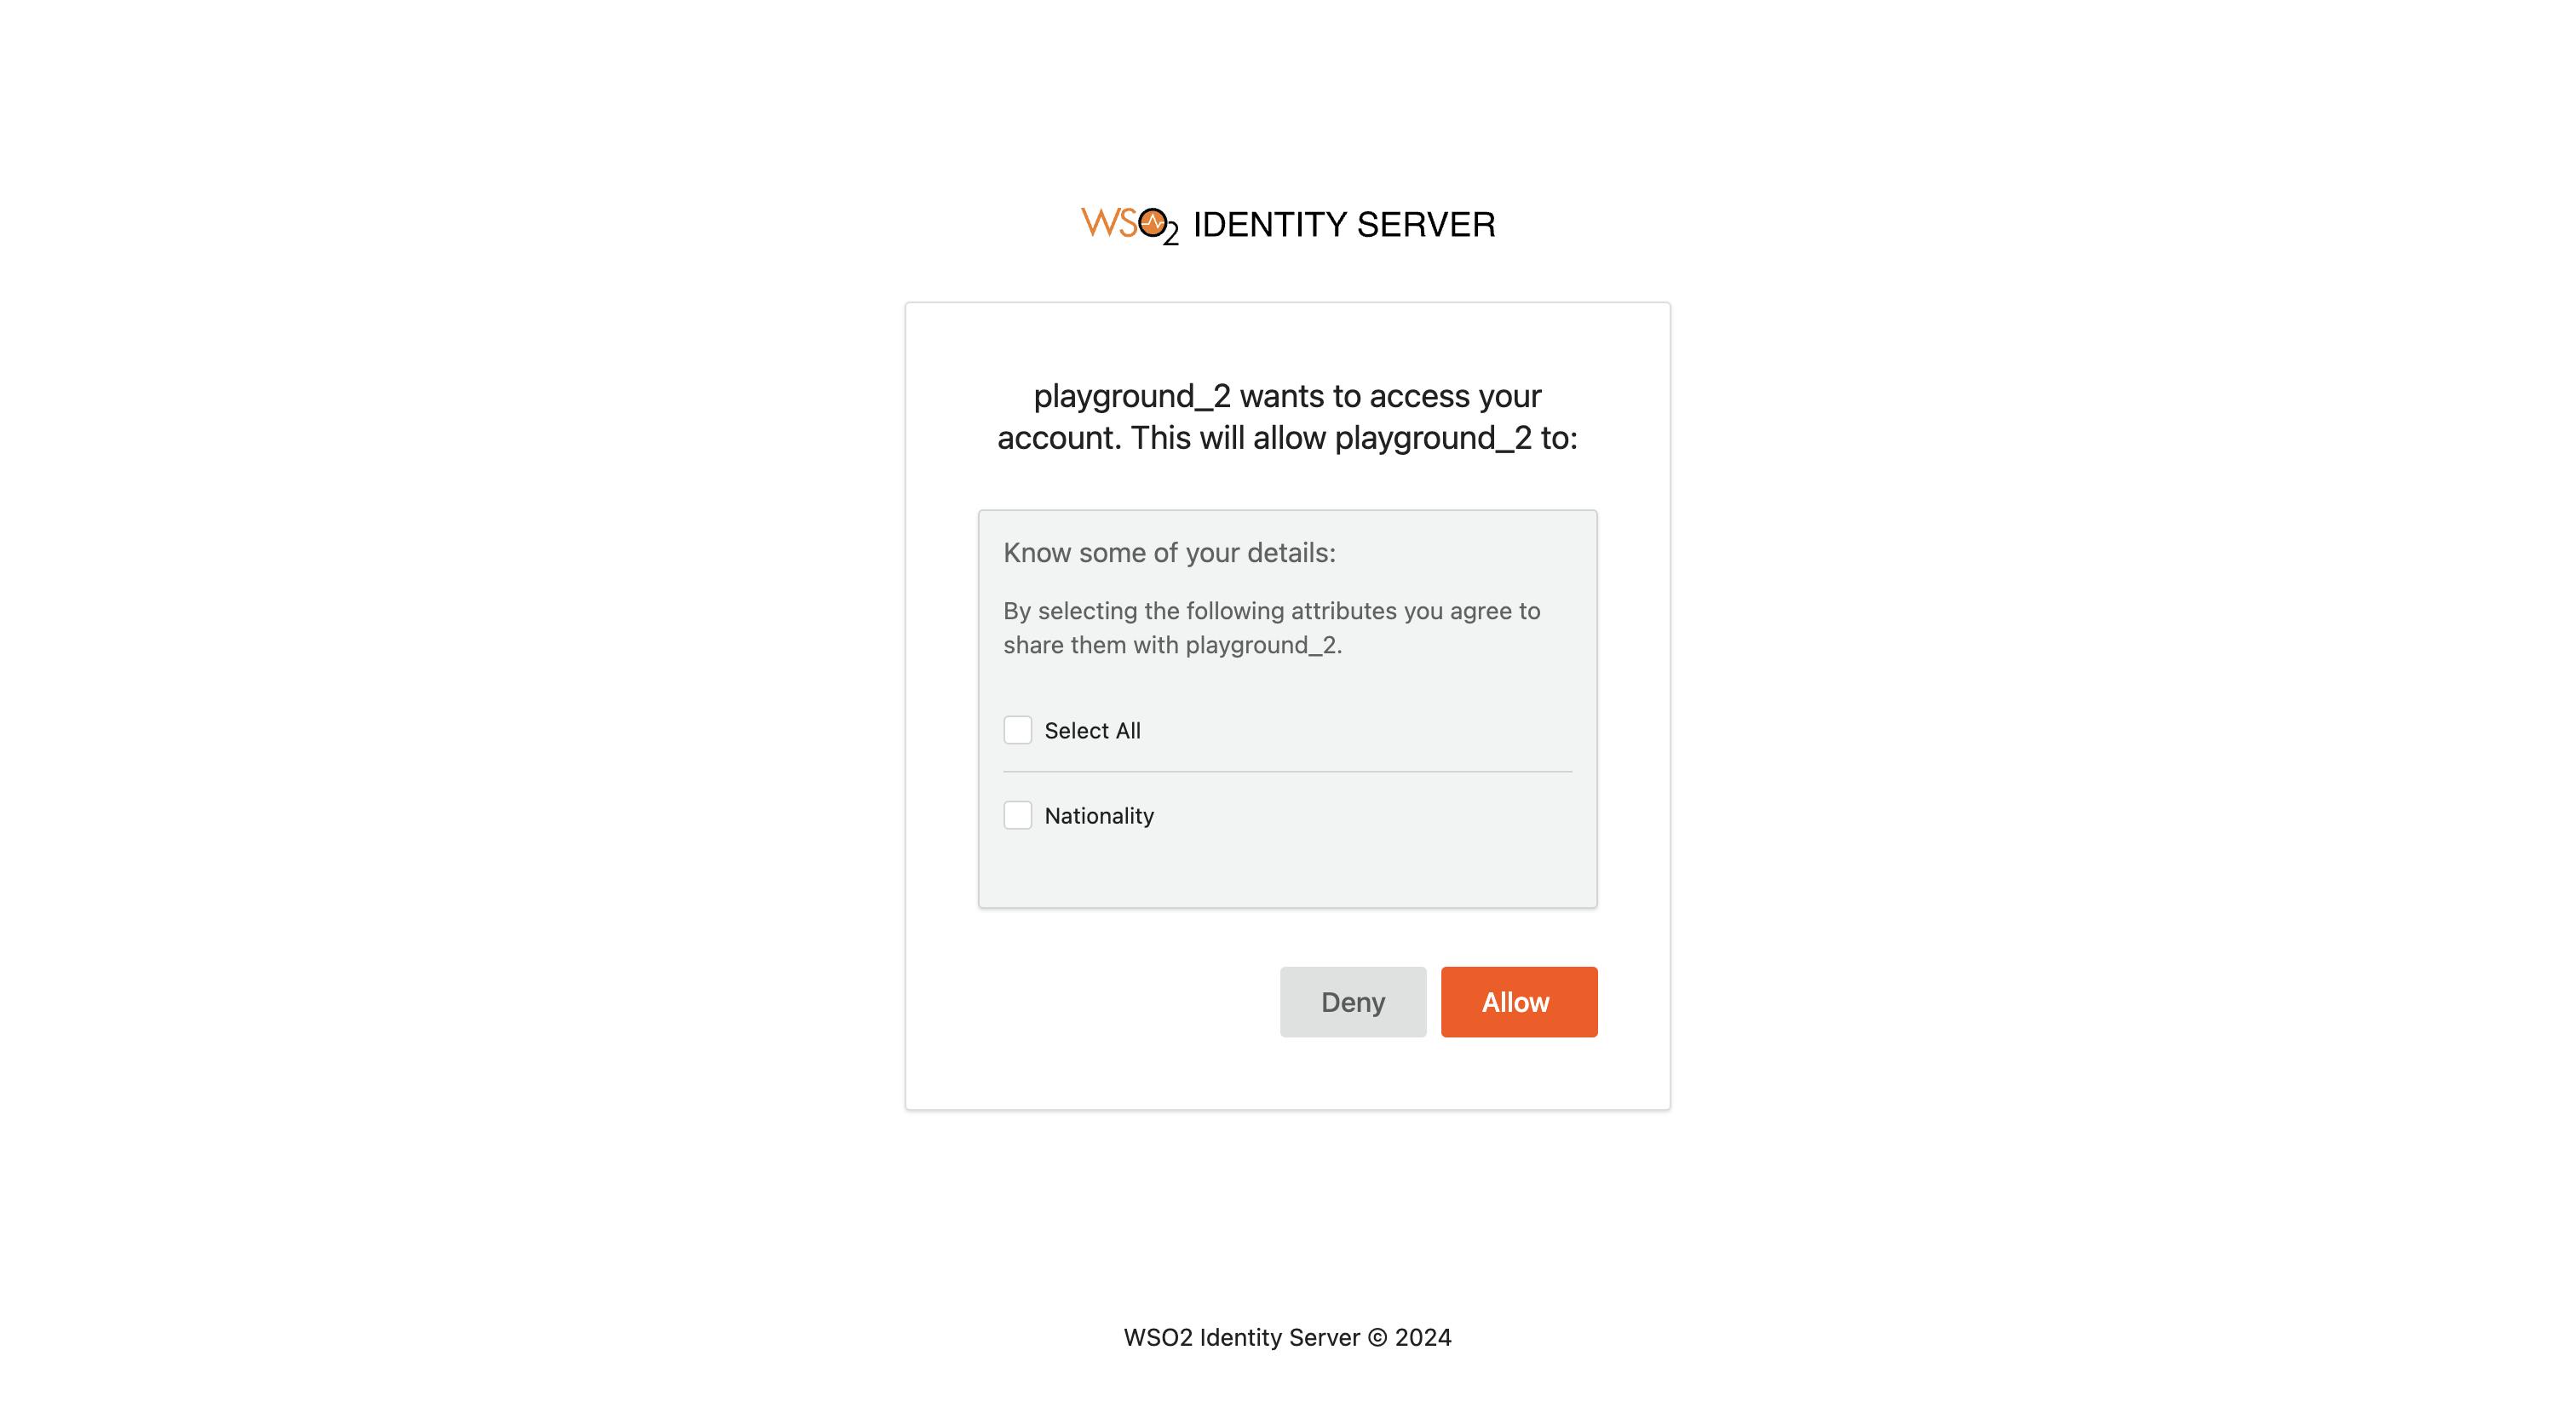
Click on Select All and click Allow.
Get the Authorization Code from the query param code and execute the following cURL command to get the Access and ID Tokens. Make sure to replace the code value you obtained in the following request.
curl -v -X POST --basic -u provided_client_id0001:provided_client_secret0001 -H "Content-Type:application/x-www-form-urlencoded;charset=UTF-8" -k -d "grant_type=authorization_code&code=bce09a1b-5526-3148-b5c0-b6dc59a3040f&redirect_uri=http://localhost:8080/playground2/oauth2client" https://localhost:9443/oauth2/token

Next, check the ID Token in https://jwt.io/ to verify whether you have the nationality claim in the token.

Similarly, you can run the following cURL command to get the user info from /oauth2/userinfo endpoint as well. Make sure to replace the Access Token with the one you got. (The random string after the word Bearer)
curl -k -v -H "Authorization: Bearer 6fbb6105-10c4-392e-977a-2cd1e7f666ce " https://localhost:9443/oauth2/userinfo

So this is it! This is how you can send custom claim values with custom scopes! We will look at our next grant type, Implicit Grant in the next article.