

Photo by Erik Mclean on Unsplash
OAuth2 and OpenID Connect with WSO2 IS - Part 4
Authorization Code Grant


🧬 Introduction
As we discussed earlier, there are a few grant types that allow us to get Access Tokens so that our client application can access the resources in the resource server on our behalf. They are,
Authorization Code Grant Type
Implicit Grant Type
Password Grant Type
Client Credentials Grant Type
Refresh Token Grant Type
JWT Grant Type
SAML2 bearer Grant Type
Kerberos Grant Type
Before understanding what Authorization Code Grant is we need to get an idea about two main endpoints in the OAuth2.0 framework. They are,
/oauth2/authorizeendpoint/oauth2/tokenendpoint
The /oauth2/authorize endpoint is used to interact with the resource owner and get the authorization to access the protected resource. To better understand this, imagine that you want to log in to a service using your Google account. First, the service redirects you to Google to authenticate(if you are not already logged in), and then you will get a consent screen, where you will be asked to authorize the service to access some of your data. Some of the request parameters passed to the /oauth2/authorize endpoint are,
response_type↳ Tells the authorization server which grant to execute
client_id↳ The ID of the application that asks for authorization
redirect_uri↳ A successful response from
/authorizeendpoint results in a redirect to this URLscope↳ A space-delimited list of permissions that the application requires
The /oauth2/token endpoint is used by the application to get an Access Token or a Refresh Token. It is used by all the grant flows except for the Implicit Grant because in that case an Access Token is issued directly.
When you are using the aforementioned grant types, you can send requests to either the /oauth2/authorize endpoint or /oauth2/token endpoint. But, if you are sending the request to the /oauth2/authorize endpoint, you will need to authenticate yourself.
There are three flows that allow you to authenticate and get an ID Token along with the Access Token*.
Authorization Code Grant Flow
↳
response_type=codeImplicit Grant Flow
↳
response_type=id_token tokenorresponse_type=id_tokenorresponse_type=tokenHybrid Flow
↳ Using other response-type values defined in OAuth2.0 Multiple Response Type Encoding Practices
For the Authorization Code Grant type we have to use the response_type=code and for the Implicit Grant type, we have to use the response_type=id_token ,response_type=token or reponse_tye=id_token token . In this article, we will be discussing the Authorization Code Grant Flow.
* In the Authorization Code Grant and Implicit Grant scenarios, they are requesting the /oauth2/authorize endpoint to get an Access Token along with an ID Token. The other grant types do not request to the /oauth2/authorize endpoint. They request to the /oauth2/token endpoint and get the Access Token(And sometimes the ID Token). But, in the case of the Refresh Token Grant type, if you have to get an Access Token via Authorization Code or Password Grant types initially, to request for the user info (which comes with the ID Token). Then you can get fresh Access Tokens upon their expiry using the Refresh Token Grant.
〰️ Authorization Code Grant Flow
The Authorization Code Grant type is optimized for confidential clients as it provides a few important security benefits.
It can authenticate the client
It can transmit the Access Token directly to the client without passing it through the resource owner's user-agent(browser)
This grant type is suitable when the resource owner is a user and the client is a website.

As you can see in the diagram, the client directs the resource owner to the authorization server, instead of requesting authorization directly from the resource owner. Then the resource owner is redirected back to the client with the Authorization Code which the client application will capture and exchange for an Access Token in the background. Since this is a redirection-based flow, the client must be able to interact with the resource owner's user-agent(browser) and receive the incoming requests via redirection from the authorization server. But after receiving the Authorization Code, the Client application does not need to use the user-agent to get the Access Token.
🧪 Testing Authorization Code Grant Flow with WSO2 IS
First, we need to create a Service Provider/Client in the WSO2 IS. To create a new service provider we can use the DCR we have discussed in the previous article.
Create a new service provider by executing the following cURL command.
curl -k -X POST -H "Authorization: Basic YWRtaW46YWRtaW4=" -H "Content-Type: application/json" -d '{"client_name": "playground_2","grant_types": ["authorization_code","password"], "redirect_uris": ["http://localhost:8080/playground2/oauth2client"],"ext_param_client_id":"provided_client_id0001","ext_param_client_secret":"provided_client_secret0001" }' "https://localhost:9443/api/identity/oauth2/dcr/v1.1/register"
Next, download the Apache Tomcat binary zip file and extract it to a location where you can access it easily on your machine. After that, download the playground2 sample application from WSO2 IS sample releases.
Then put the playground2.war file in the <TOMCAT_HOME>/webapps directory and open a terminal in the <TOMCAT_HOME>/bin directory. Then, run the following commands to extract the playground2.war file.
If permissions are not set
↳
chmod +x catalina.shStart the Tomcat server
↳
./catalina.sh start
After starting the Tomcat server, you will notice there is a directory created in <TOMCAT_HOME>/webapps named playground2. Stop the Tomcat server by typing ./catalina.sh stop and go to <TOMCAT_HOME>/webapps/playground2/WEB-INF/classes and open playground2.properties file. Then provide the Client ID and Client Secret for the playground2 app(When we created the Service Provider(SP) using DCR we gave provided_client_id0001 as the Client ID and provided_client_secret0001 as the Client Secret). After that, start the Tomcat server again by typing ./catalina.sh start in the terminal.

If you want to see the logs of the Tomcat server, open another terminal tab and go to <TOMCAT_HOME>/logs and type, tail -1000f catalina.out
Since our SP is configured properly, we need to request the Authorization Server to get an Authorization Code first. To do that, open your web browser in developer mode, type the following URL in the address bar and press enter.
URL format
↳
https://<IS_HOST>:<IS_PORT>/oauth2/authorize?response_type=code&client_id=<CLIENT_ID>&redirect_uri=<REDIRECT_URI>&scope=<SCOPES>Sample URL
↳
https://localhost:9443/oauth2/authorize?response_type=code&client_id=provided_client_id0001&redirect_uri=http://localhost:8080/playground2/oauth2client&scope=openid
After you enter the above URL, you will be prompted to enter credentials. You can use the default username and password (admin and admin) for this step.

After you click on the Continue button you will be redirected to the http://localhost:8080/playground2/oauth2client address, which is the URL you entered as the redirect URI of this SP. In that URL, you will find a query parameter named code which is the Authorization Code in the Authorization Code Grant flow. Note that Authorization Code is for one-time use only.

Now, using that Authorization Code you can receive an Access Token and an ID Token. Note that, you are using the Client application's credentials here because you have already completed the authentication step when you were getting the Authorization Code.
cURL format
↳
curl -v -X POST --basic -u <CLIENT_ID>:<CLIENT_SECRET> -H "Content-Type:application/x-www-form-urlencoded;charset=UTF-8" -k -d "grant_type=authorization_code&code=<AUTHORIZATION_CODE>&redirect_uri=<REDIRECT_URI>" https://localhost:9443/oauth2/tokencURL example
↳
curl -v -X POST --basic -u provided_client_id0001:provided_client_secret0001 -H "Content-Type:application/x-www-form-urlencoded;charset=UTF-8" -k -d "grant_type=authorization_code&code=9c5ead5b-1ee5-34c9-98fe-f99a1490778f&redirect_uri=http://localhost:8080/playground2/oauth2client" https://localhost:9443/oauth2/token

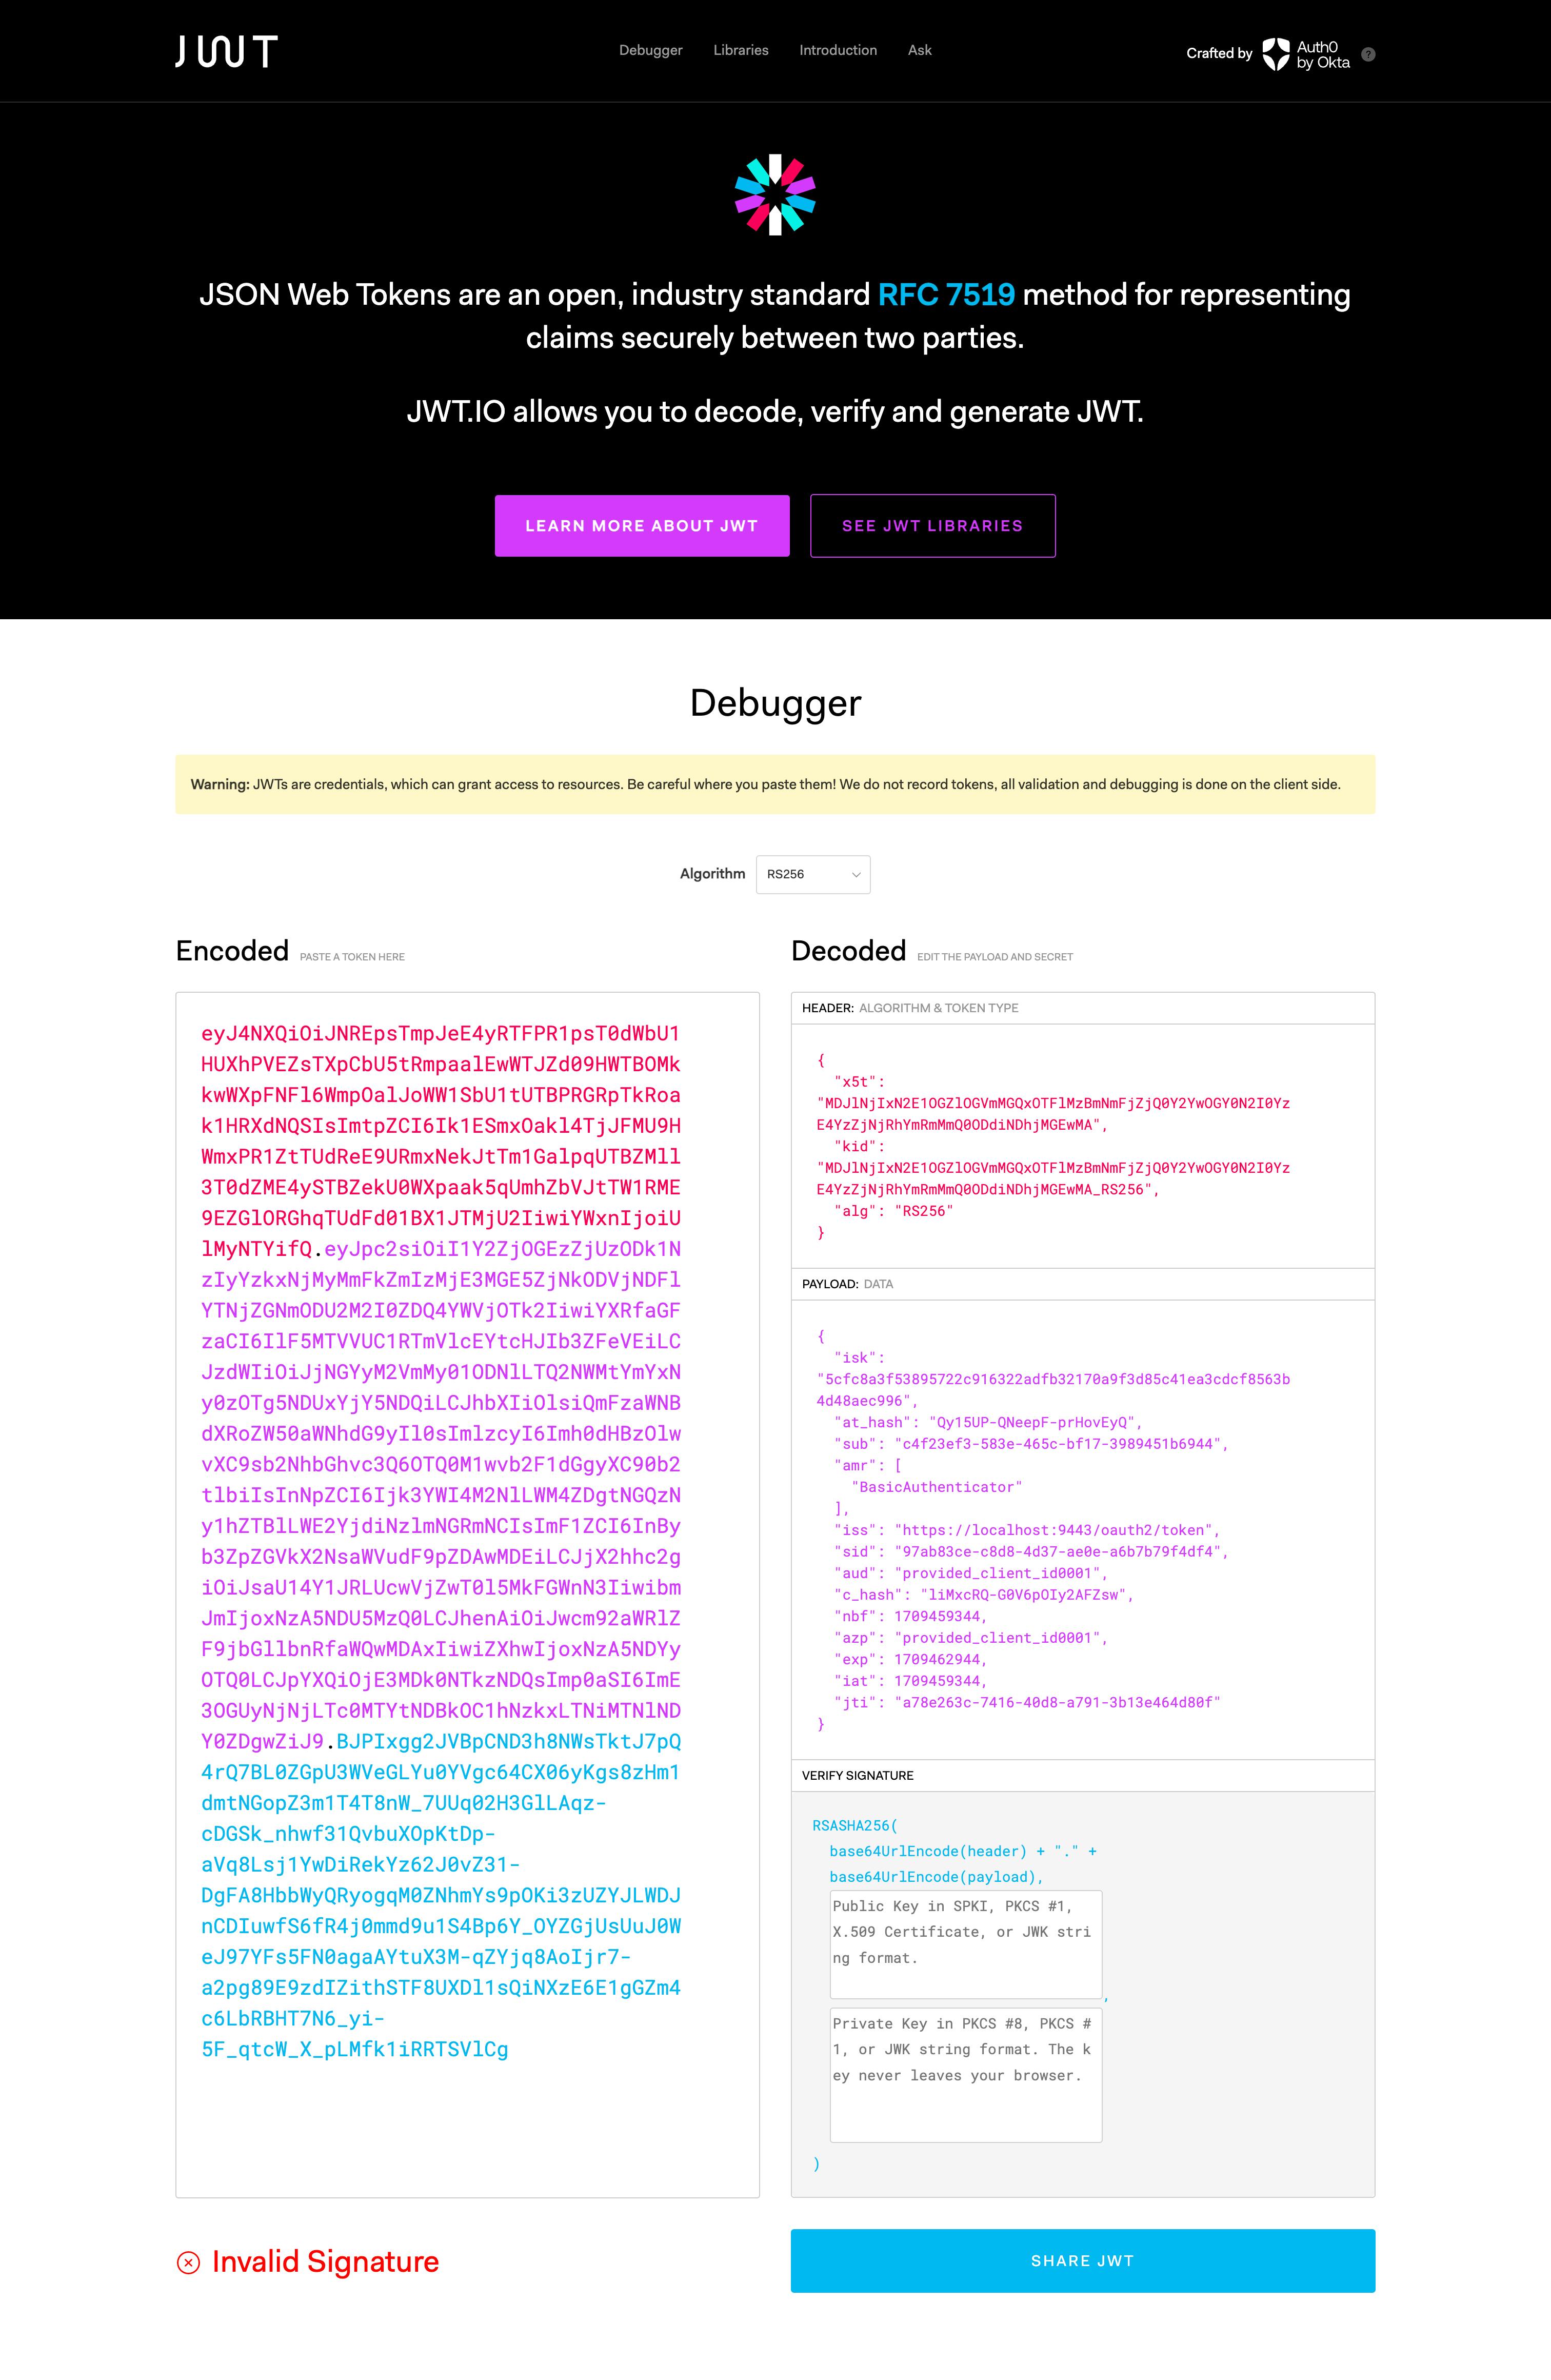
You can check what values are passed via ID Token by going to https://jwt.io/ and pasting the ID Token there.
After receiving the Access Token** and ID Token*, you will be able to retrieve the user information using the /oauth2/userinfo endpoint as well. To do that, you can execute the following cURL command.
cURL format
↳
curl -k -v -H "Authorization: Bearer <ACCESS_TOKEN> " https://<IS_PORT>:<IS_HOST>/oauth2/userinfocURL example
↳
curl -k -v -H "Authorization: Bearer 4e8e42dc-7494-39ef-a37a-487c2a3c2920 " https://localhost:9443/oauth2/userinfo
Then, you can see the following output.
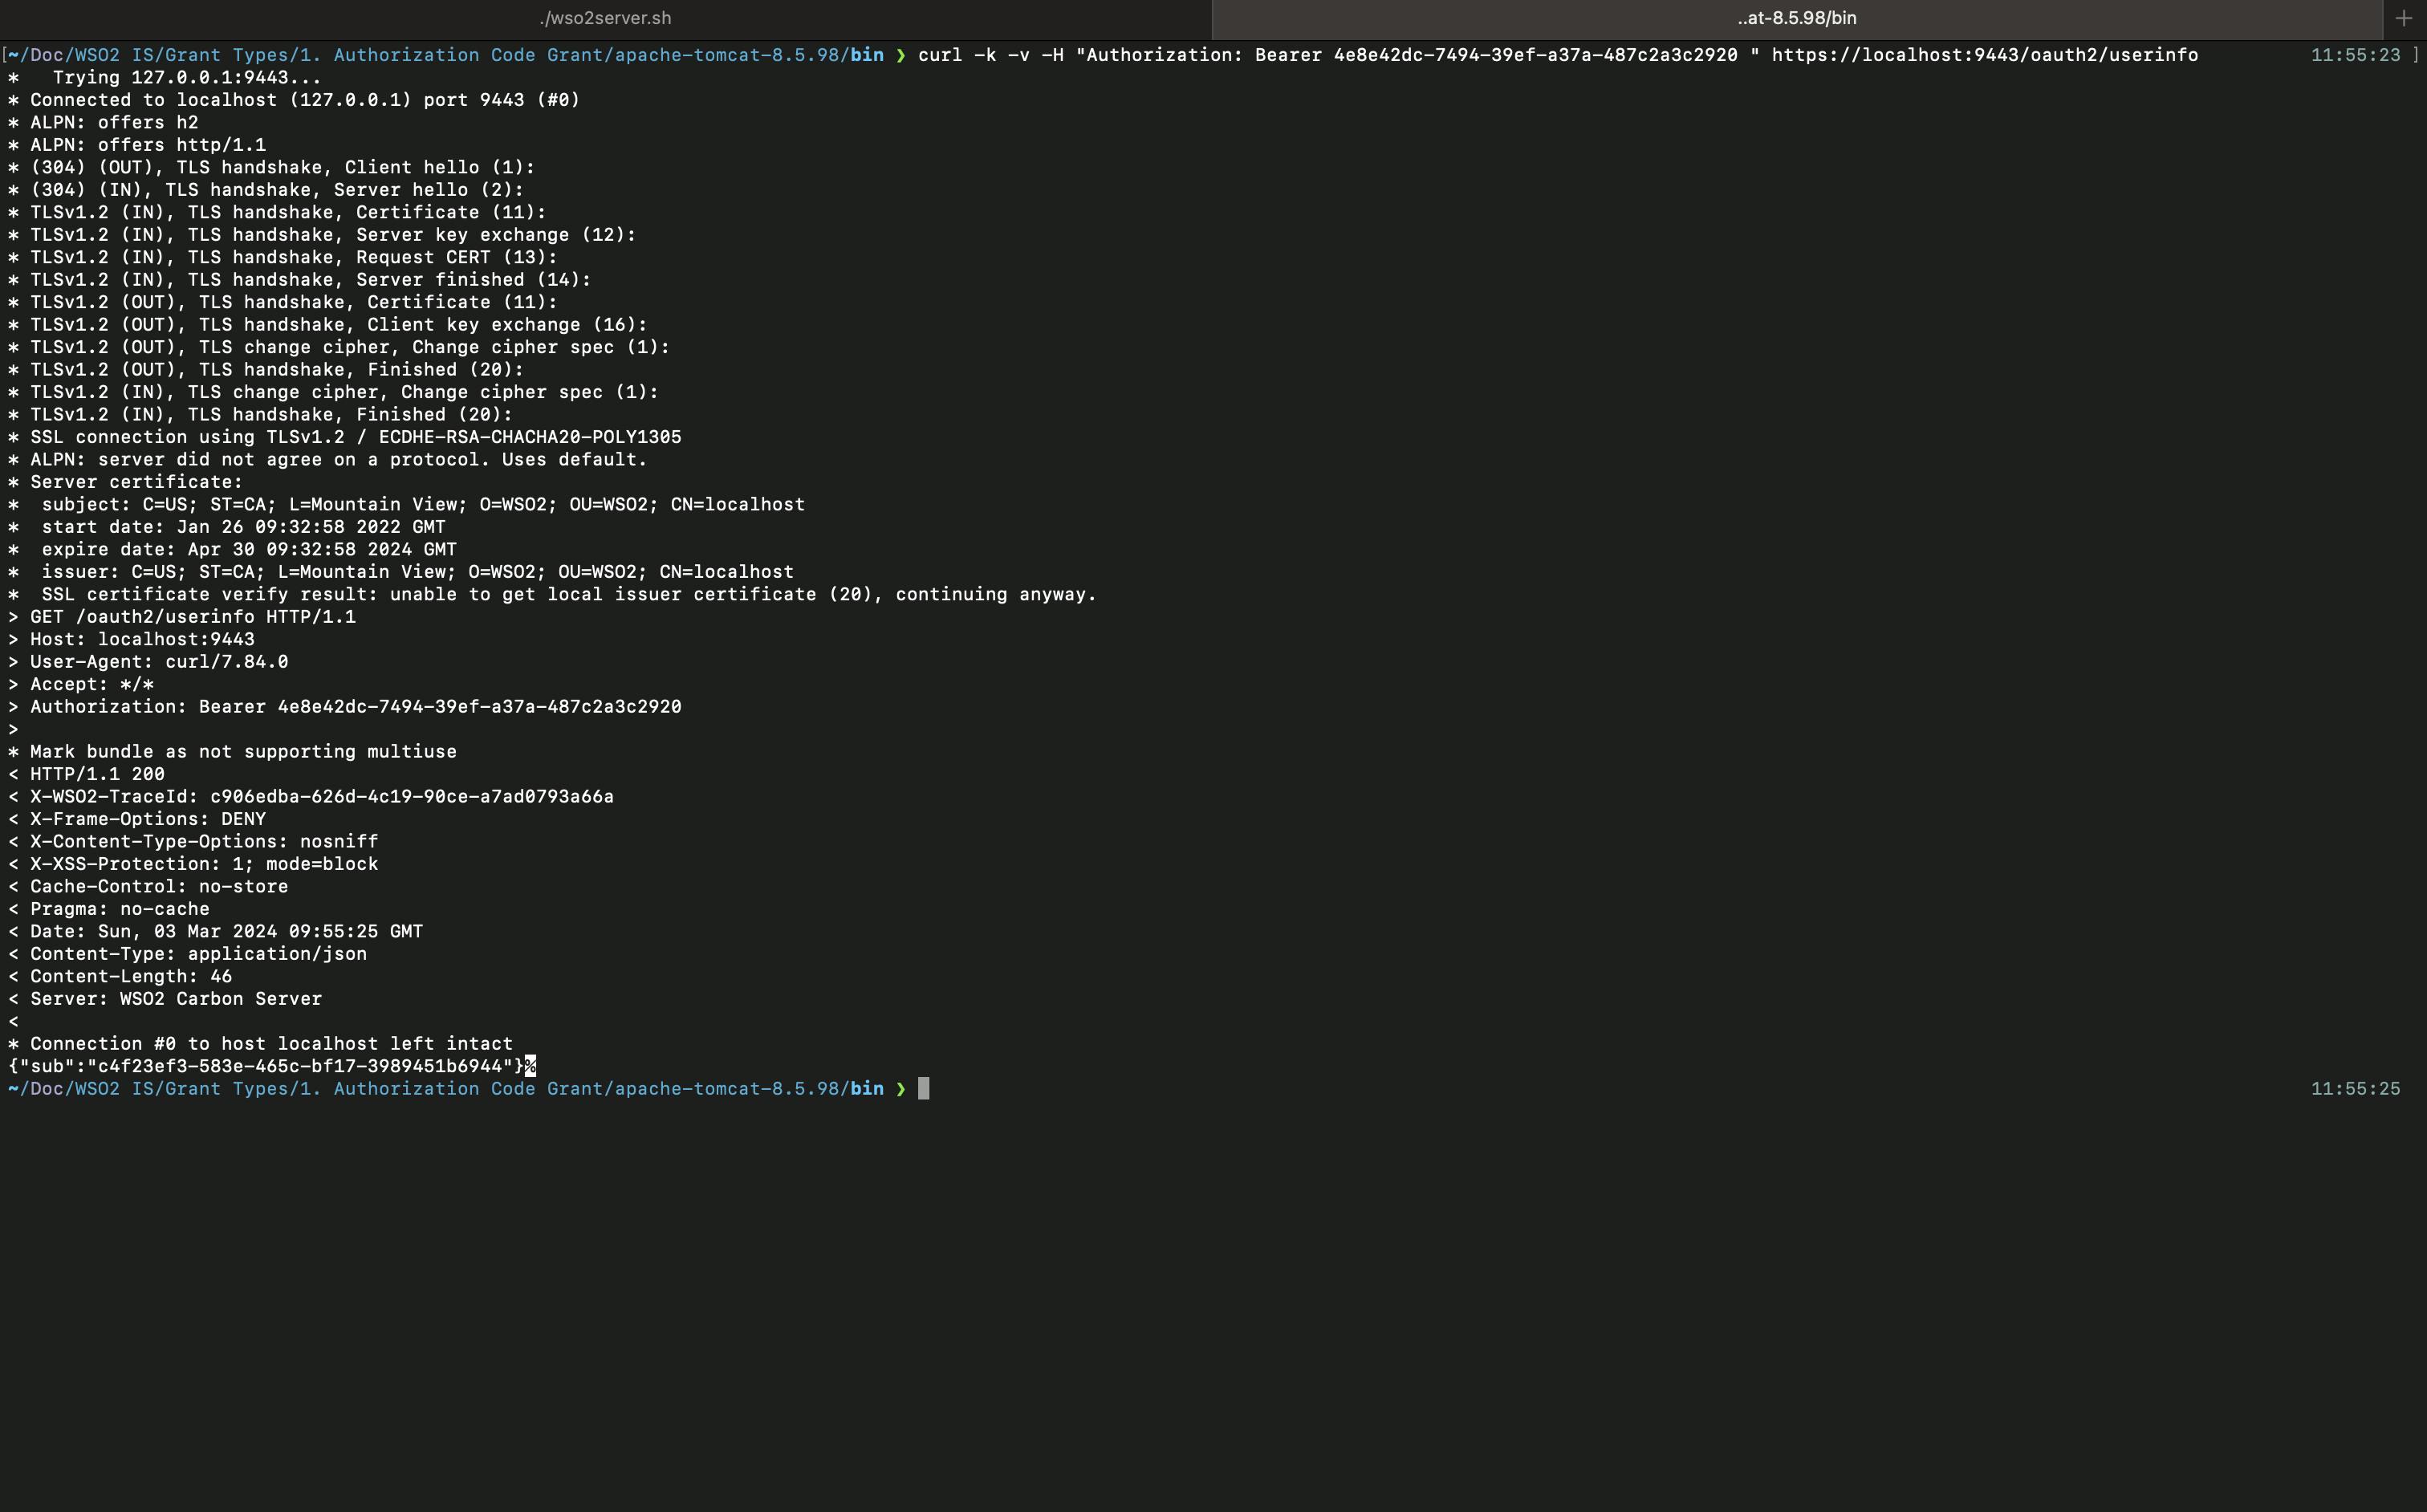
As you can see, you are only getting the sub value here because we haven't configured what claims should be mapped to the SP and what claims should be mapped to the openid scope. We will check how to configure scopes and add configure claims in SP in the next article.
* There are two types of Access Tokens:
Opaque Access Tokens
↳ A random unique string that does not contain user information which is issued from the authorization server to access a restricted resource in the resource server.
Self-contain Access Tokens
↳ When short-string identifiers are used as Access Tokens, a network request to the authorization server is required to retrieve the authorization information associated with each Access Token. However, with self-contained Access Tokens, there is no need for a network call to retrieve the authorization information, as it's self-contained.