


Photo by Jornada Produtora on Unsplash
OAuth2 and OpenID Connect with WSO2 IS - Part 7
Implicit Grant Type


🧬 Introduction
As we discussed in the Authorization Code Flow article, the Implicit Grant flow is an authentication flow defined in the OIDC specification that allows you to authenticate a user and obtain an AccessToken. The Implicit Grant flow allows a client application to obtain an access token directly from the Authorization Server without an intermediate Authorization Code exchange. This flow is commonly used in browser-based applications where the client application runs in a web browser.
In Implicit Grant flow, the Access Token is exposed in the browser's URL fragment, which can make it vulnerable to certain types of attacks, such as cross-site scripting(XSS). Therefore, this flow is typically not recommended for applications that require high security.
〰️ Implicit Grant Flow

As you can see in the above diagram, first, the user visits the client application and requests for login through the WSO2 Identity Server. Then, the client application redirects the authorization request to the WSO2 Identity Server and the user can enter the credentials there. After successful authentication, the WSO2 Identity Server sends the Access Token to the client application in the URL. Using the Access Token the client application can access the resources from the Resource Server.
🧪 Testing Implicit Grant Flow with WSO2 IS
First, we need to create a Service Provider(SP) in the WSO2 IS. To create a new SP we can use the DCR we have discussed in a previous article.
curl -k -X POST -H "Authorization: Basic YWRtaW46YWRtaW4=" -H "Content-Type: application/json" -d '{"client_name": "playground_2","grant_types": ["authorization_code","password","implicit"], "redirect_uris": ["http://localhost:8080/playground2/oauth2client"],"ext_param_client_id":"provided_client_id0001","ext_param_client_secret":"provided_client_secret0001" }' "https://localhost:9443/api/identity/oauth2/dcr/v1.1/register"
Next, download the Apache Tomcat binary zip file and extract it to a location where you can access it easily on your machine. After that, download the playground2 sample application from WSO2 IS sample releases.
Then put the playground2.war file in the <TOMCAT_HOME>/webapps directory and open a terminal in the <TOMCAT_HOME>/bin directory. Then, run the following commands to extract the playground2.war file.
If permissions are not set
↳
chmod +x catalina.shStart the Tomcat server
↳
./catalina.sh start
After starting the Tomcat server, you will notice there is a directory created in <TOMCAT_HOME>/webapps named playground2. Stop the Tomcat server by typing ./catalina.sh stop and go to <TOMCAT_HOME>/webapps/playground2/WEB-INF/classes and open playground2.properties file. Then provide the Client ID and Client Secret for the playground2 app(When we created the Service Provider(SP) using DCR we gave provided_client_id0001 as the Client ID and provided_client_secret0001 as the Client Secret). After that, start the Tomcat server again by typing ./catalina.sh start in the terminal.

If you want to see the logs of the Tomcat server, open another terminal tab and go to <TOMCAT_HOME>/logs and type, tail -1000f catalina.out
Since our SP is configured properly, we can get the Access Token directly using the below URL. To do that, open your web browser in developer mode, type the following URL in the address bar and press enter.
URL format
↳
https://localhost:9443/oauth2/authorize?response_type=token&client_id=<CLIENT_ID>&redirect_uri=<REDIRECT_URL>&scope=<SCOPES>Sample URL
↳
https://localhost:9443/oauth2/authorize?response_type=token&client_id=provided_client_id0001&scope=openid&redirect_uri=http://localhost:8080/playground2/oauth2client
Notice the response_type when you are entering the URL. According to the OIDC specification, you can invoke Implicit Grant flow by using the following response types.
response_type=id_token token↳ If you want to get both Access and ID Tokens, you can use this, the URL format is as follows. But you have to use an additional parameter called
noncehttps://localhost:9443/oauth2/authorize?response_type=id_token token&client_id=<CLIENT_ID>&redirect_uri=<REDIRECT_URL>&scope=<SCOPES>&nonce=oidcresponse_type=id_token↳ If you want to get only the ID Token, you can use this, the URL format is as follows. But you have to use an additional parameter called
noncehttps://localhost:9443/oauth2/authorize?response_type=id_token&client_id=<CLIENT_ID>&redirect_uri=<REDIRECT_URL>&scope=<SCOPES>&nonce=oidcresponse_type=token↳ If you want to get only the Access Token, you can use this, the URL format is as follows. In this case, you don't have to use the
nonceparameterhttps://localhost:9443/oauth2/authorize?response_type=token&client_id=<CLIENT_ID>&redirect_uri=<REDIRECT_URL>&scope=<SCOPES>
Also, notice that you are sending the request to the /authorize endpoint. So it means that you will be authenticated (Refer to the article on Authorization Code Flow to know about this more).
After you enter the above URL, you will be prompted to enter credentials. You can use the default username and password (admin and admin) for this step.

After you click on the Continue button you will be redirected to the http://localhost:8080/playground2/oauth2client address, which is the URL you entered as the redirect URI of this SP. In that URL, you will find a query fragment named access_token which will contain the Access Token you can use to obtain user-info at the /userinfo endpoint.
cURL format
↳
curl -k -v -H "Authorization: Bearer <ACCESS_TOKEN>" https://localhost:9443/oauth2/userinfocURL example
↳
curl -k -v -H "Authorization: Bearer 3a81cb8c-e37c-36a1-b005-57a6760d354d" https://localhost:9443/oauth2/userinfo
Then, you can see the following output.
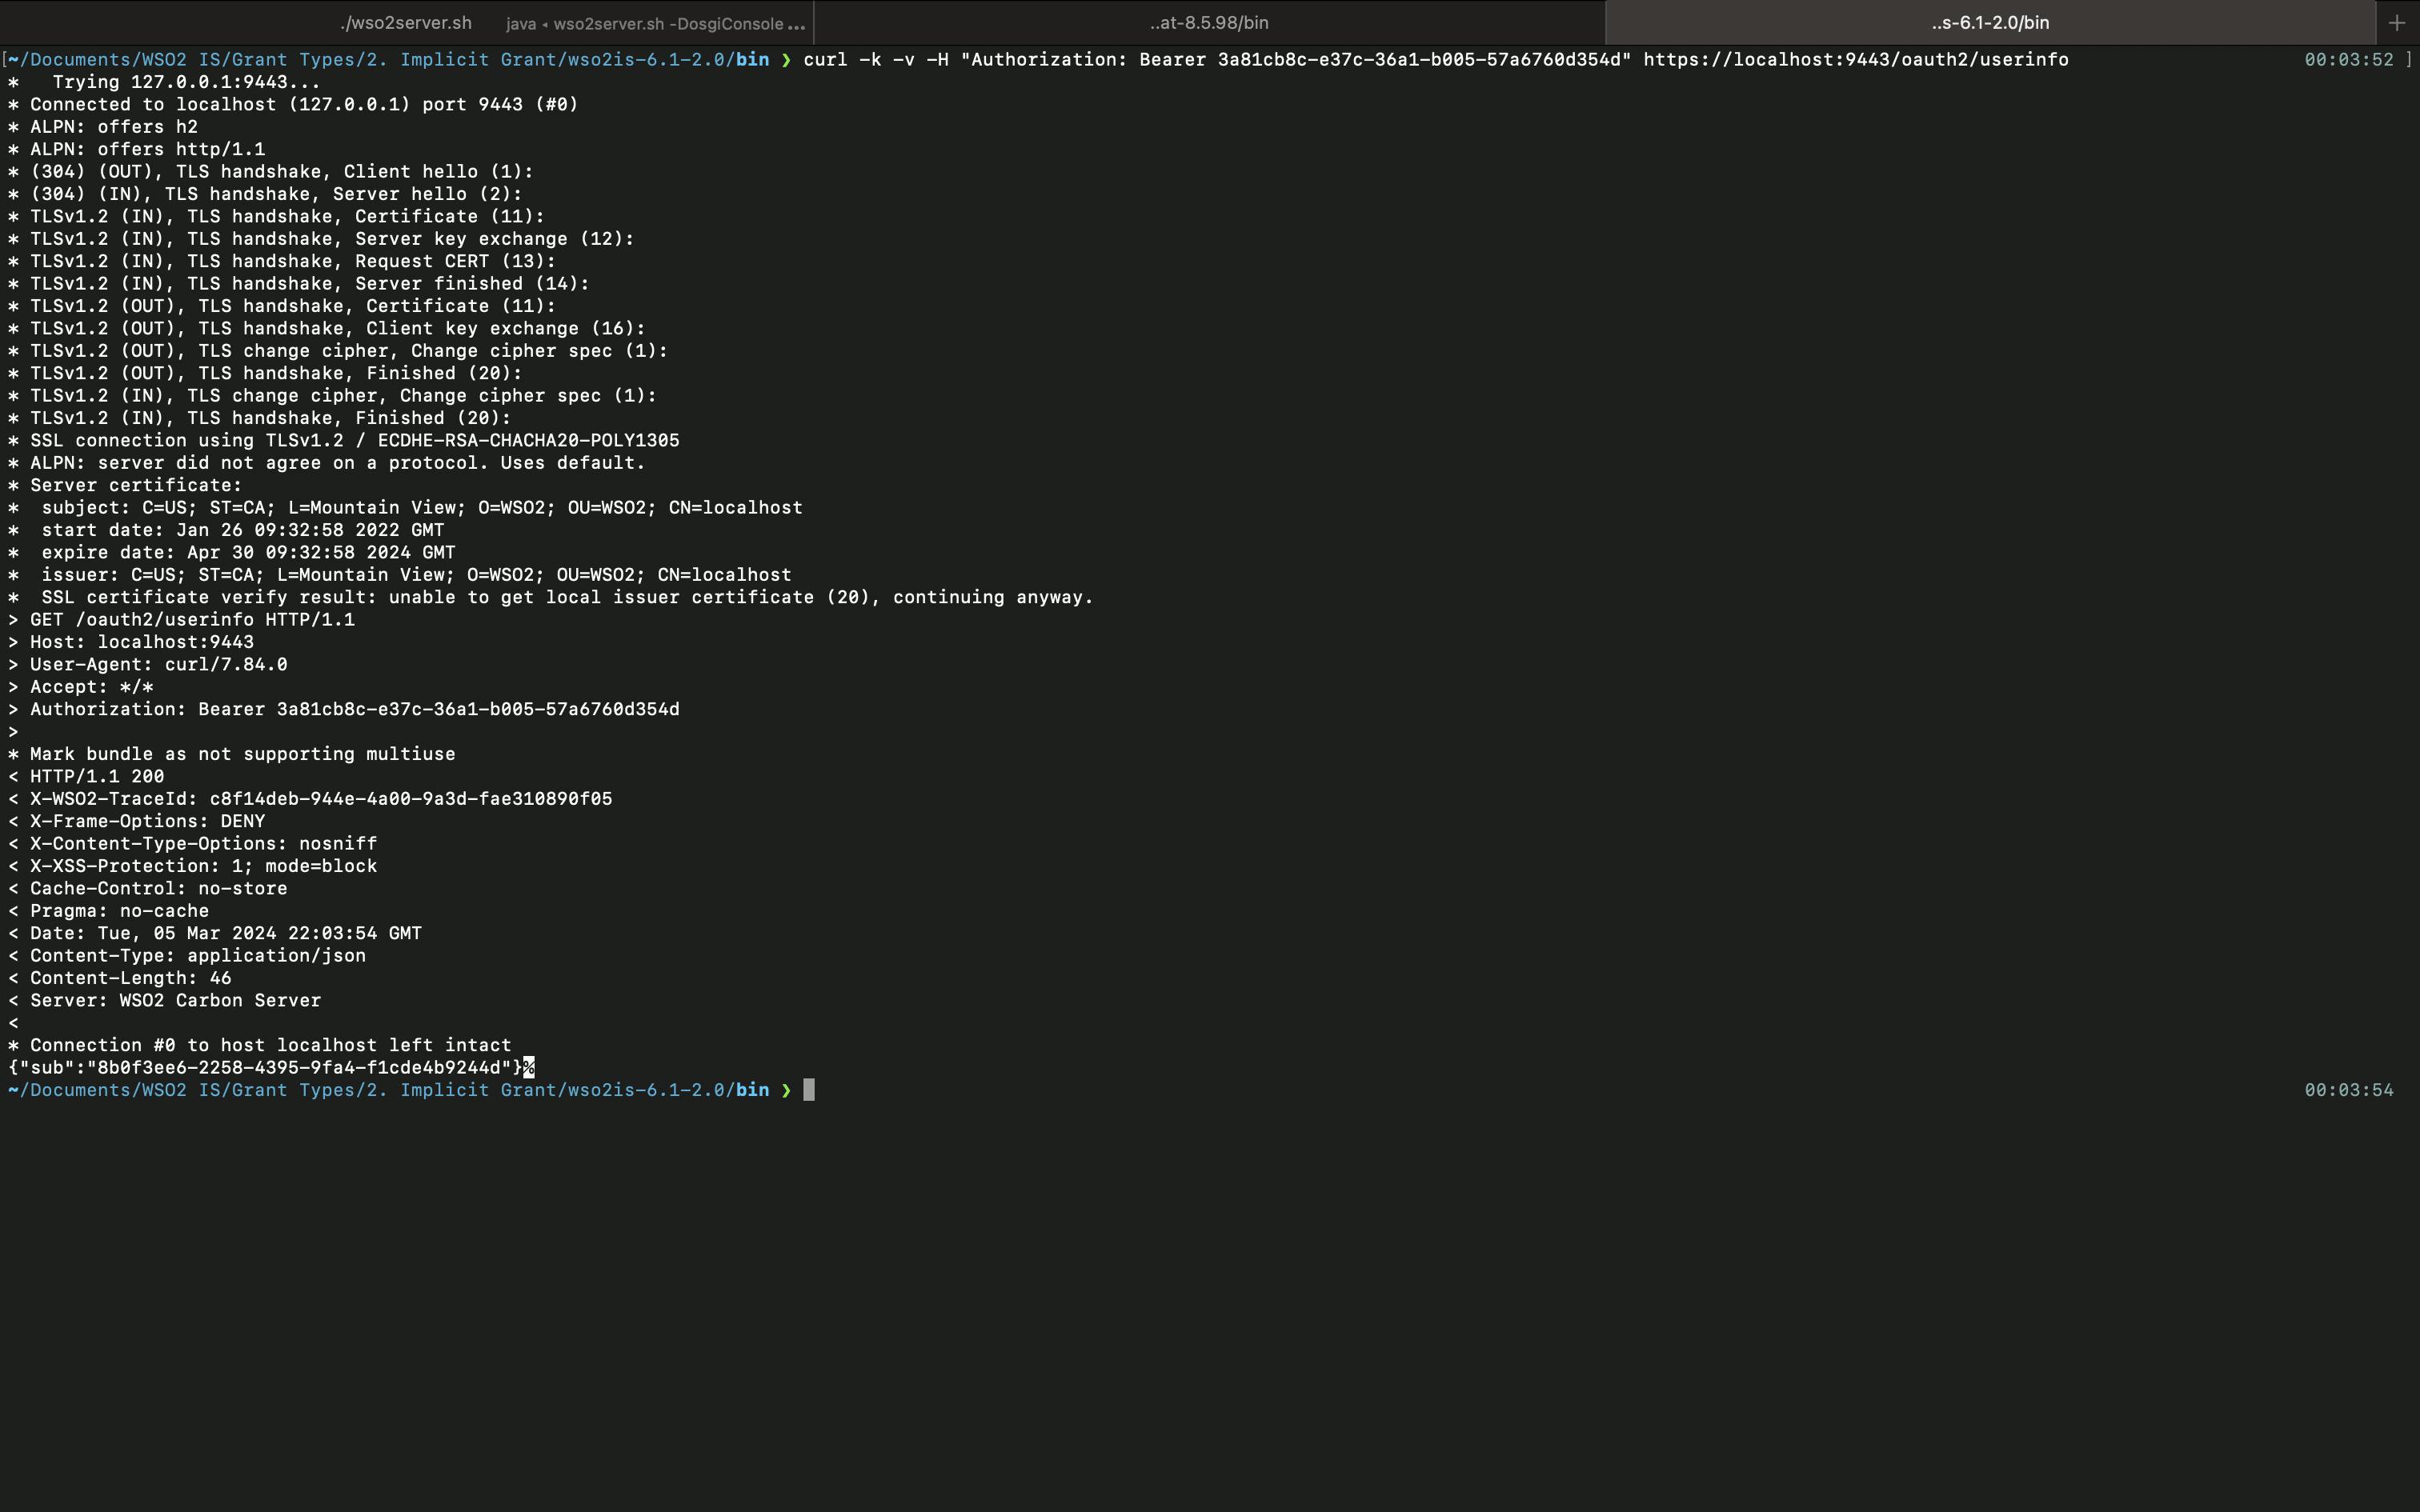
As you can see, you are only getting the sub value because we haven't configured what claims should be mapped to the SP and what claims should be mapped to the openid scope. You can check my previous articles on, how to create scopes and claim configuration to understand more about how you can get more claims using the /oauth2/userinfo endpoint.
So this is it about the Implicit Grant type. We will explore how to use the Password Grant type in the upcoming article.