

Photo by Paulius Dragunas on Unsplash
OAuth2 and OpenID Connect with WSO2 IS - Part 10
Refresh Token Grant Type


🧬 Introduction
The Refresh Token Grant provides a way for client applications to obtain a new Access Token without requiring the user to re-authenticate. This can help improve the user experience by avoiding unnecessary login prompts and reducing the load on the Authorization Server by reducing the frequency of authentication requests. Refresh Tokens typically have a longer lifetime than Access Tokens, and the user or the Authorization Server can revoke them at any time.
〰️ Refresh Token Grant Flow
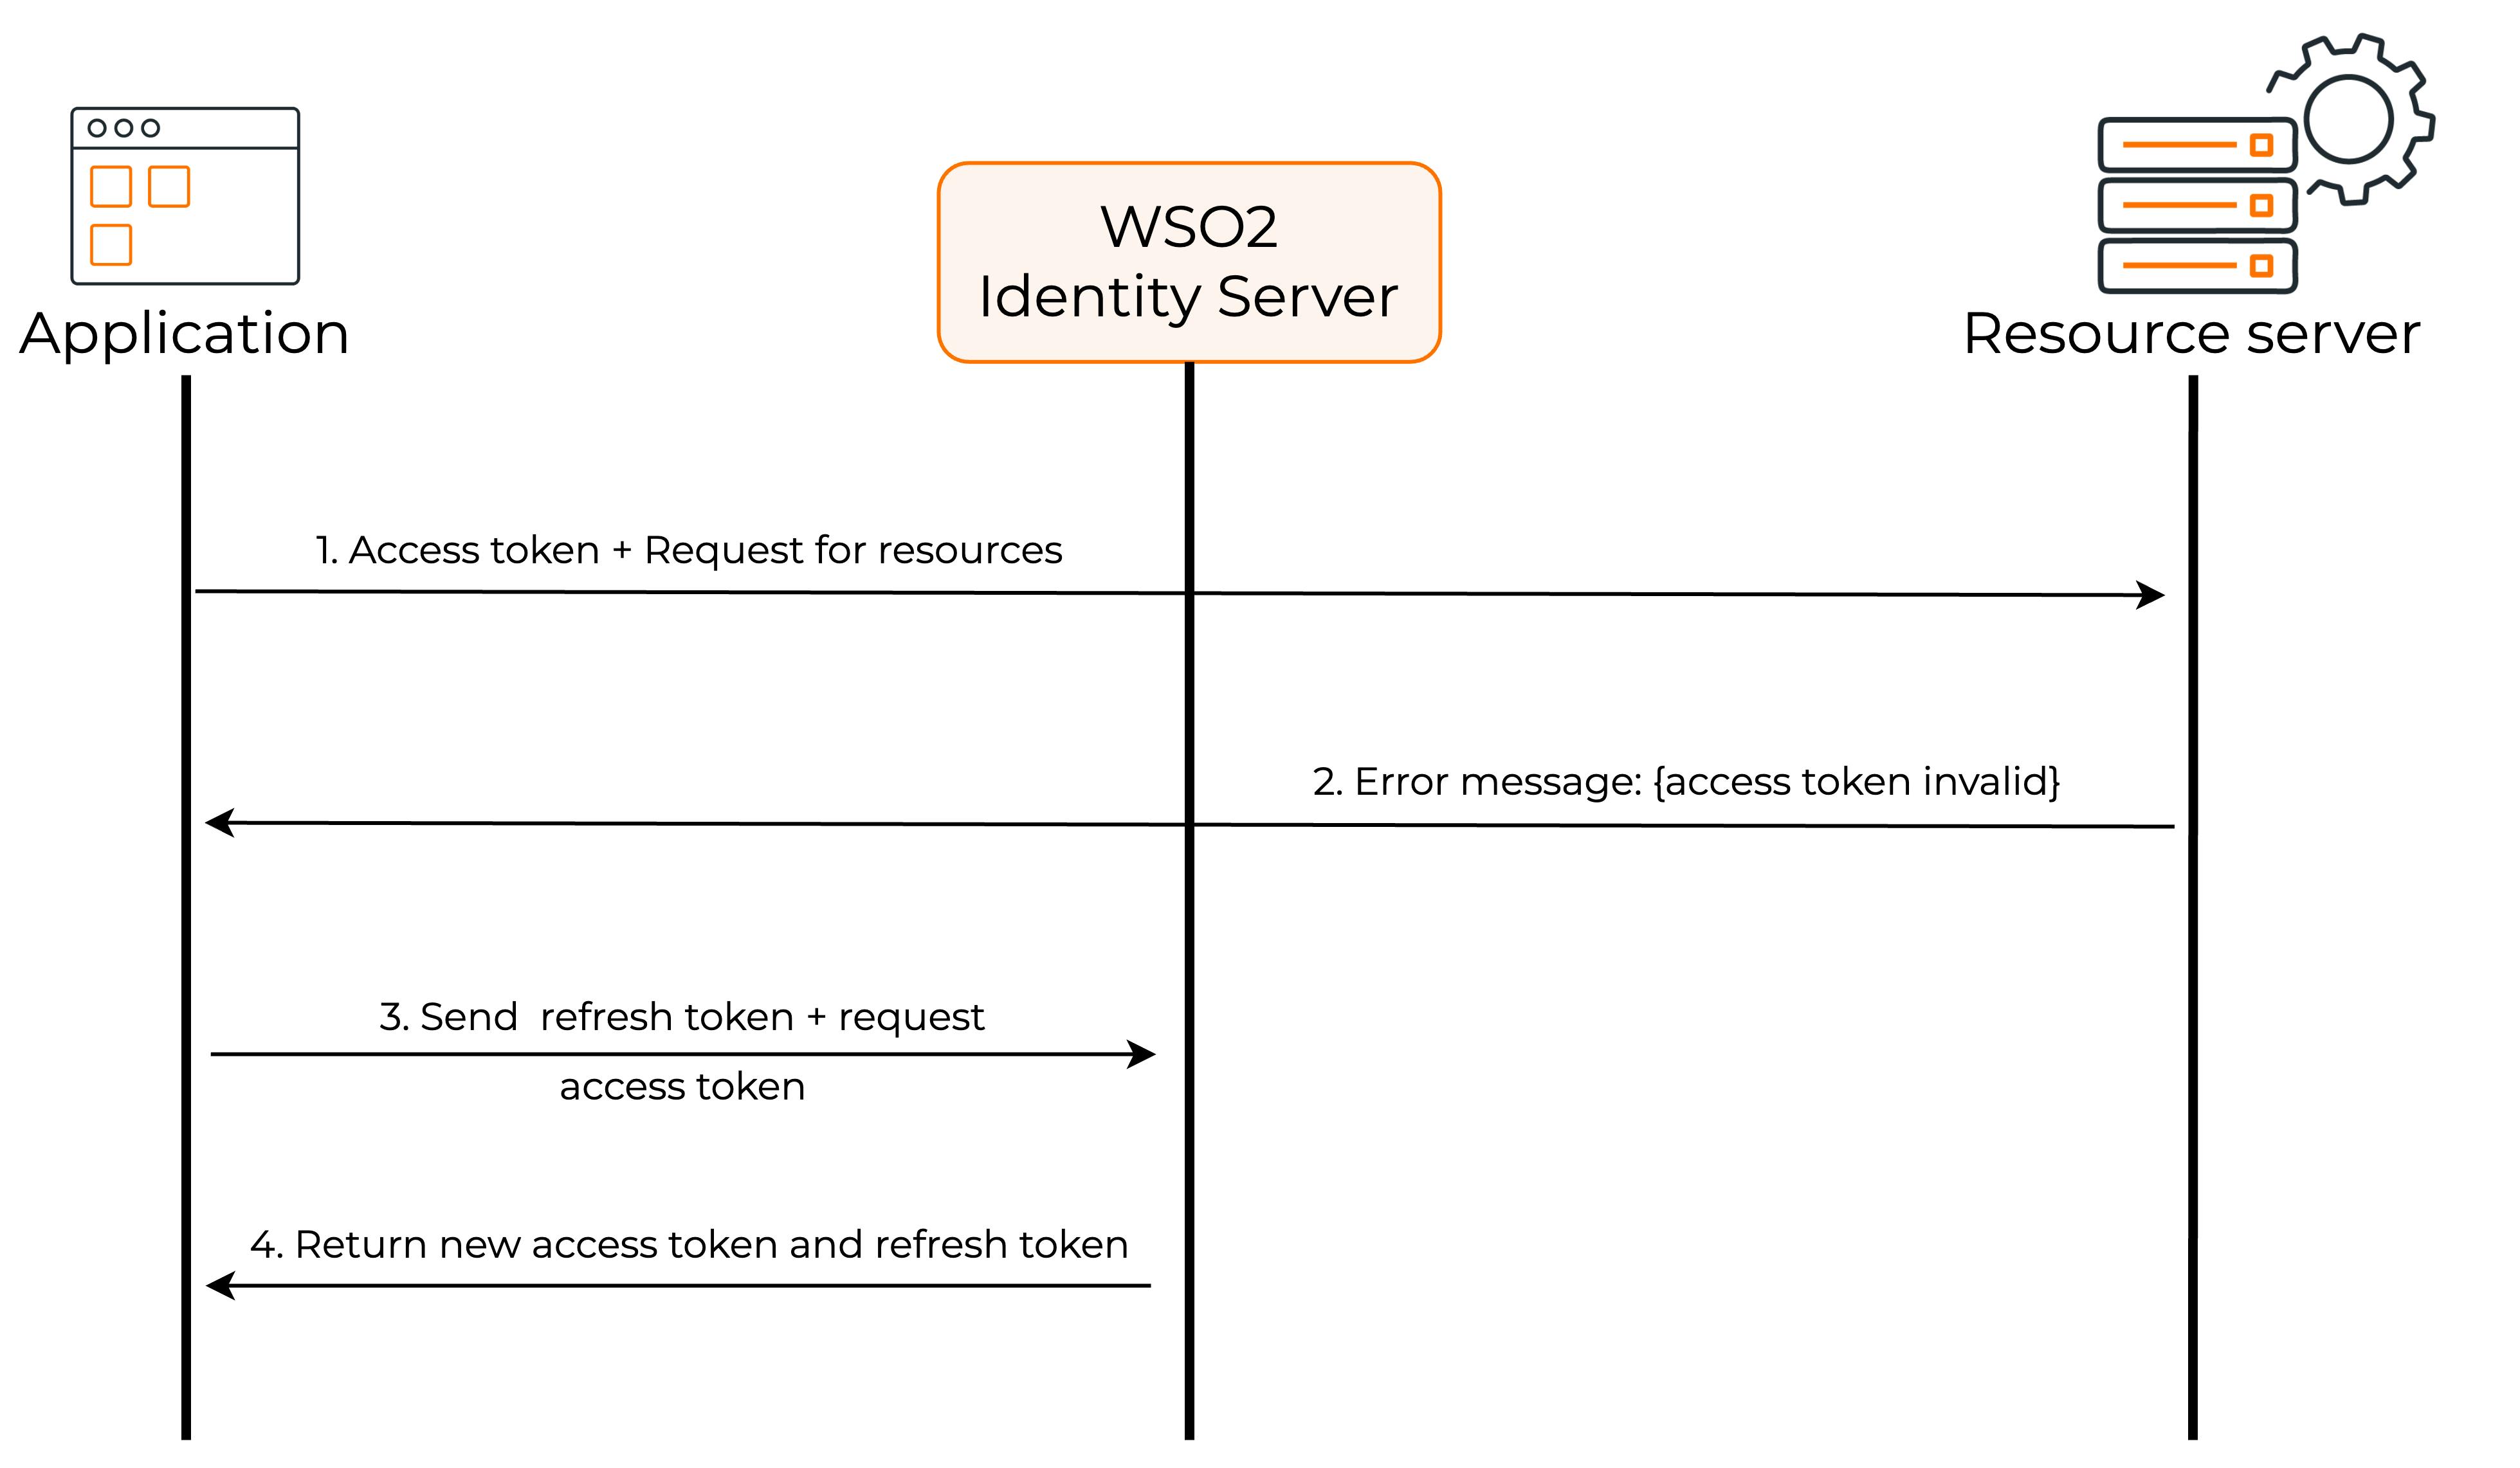
First, you have to generate a Refresh Token with Authorization Code Flow or Password Grant. Then, you can use the Access Token you have generated with either of the flows until it expires. When the Access Token is expired, you can send the Refresh Token to the Authorization Server, and ask for a fresh Access Token.
🧪 Testing Client Refresh Token Grant Flow with WSO2 IS
First, we need to create a Service Provider(SP) in the WSO2 IS. To create a new SP we can use the DCR we have discussed in a previous article.
curl -k -X POST -H "Authorization: Basic YWRtaW46YWRtaW4=" -H "Content-Type: application/json" -d '{"client_name": "playground_2","grant_types": ["authorization_code","refresh_token"], "redirect_uris": ["http://localhost:8080/playground2/oauth2client"],"ext_param_client_id":"provided_client_id0001","ext_param_client_secret":"provided_client_secret0001" }' "https://localhost:9443/api/identity/oauth2/dcr/v1.1/register"
Next, download the Apache Tomcat binary zip file and extract it to a location where you can access it easily on your machine. After that, download the playground2 sample application from WSO2 IS sample releases.
Then put the playground2.war file in the <TOMCAT_HOME>/webapps directory and open a terminal in the <TOMCAT_HOME>/bin directory. Then, run the following commands to extract the playground2.war file.
If permissions are not set
↳
chmod +x catalina.shStart the Tomcat server
↳
./catalina.sh start
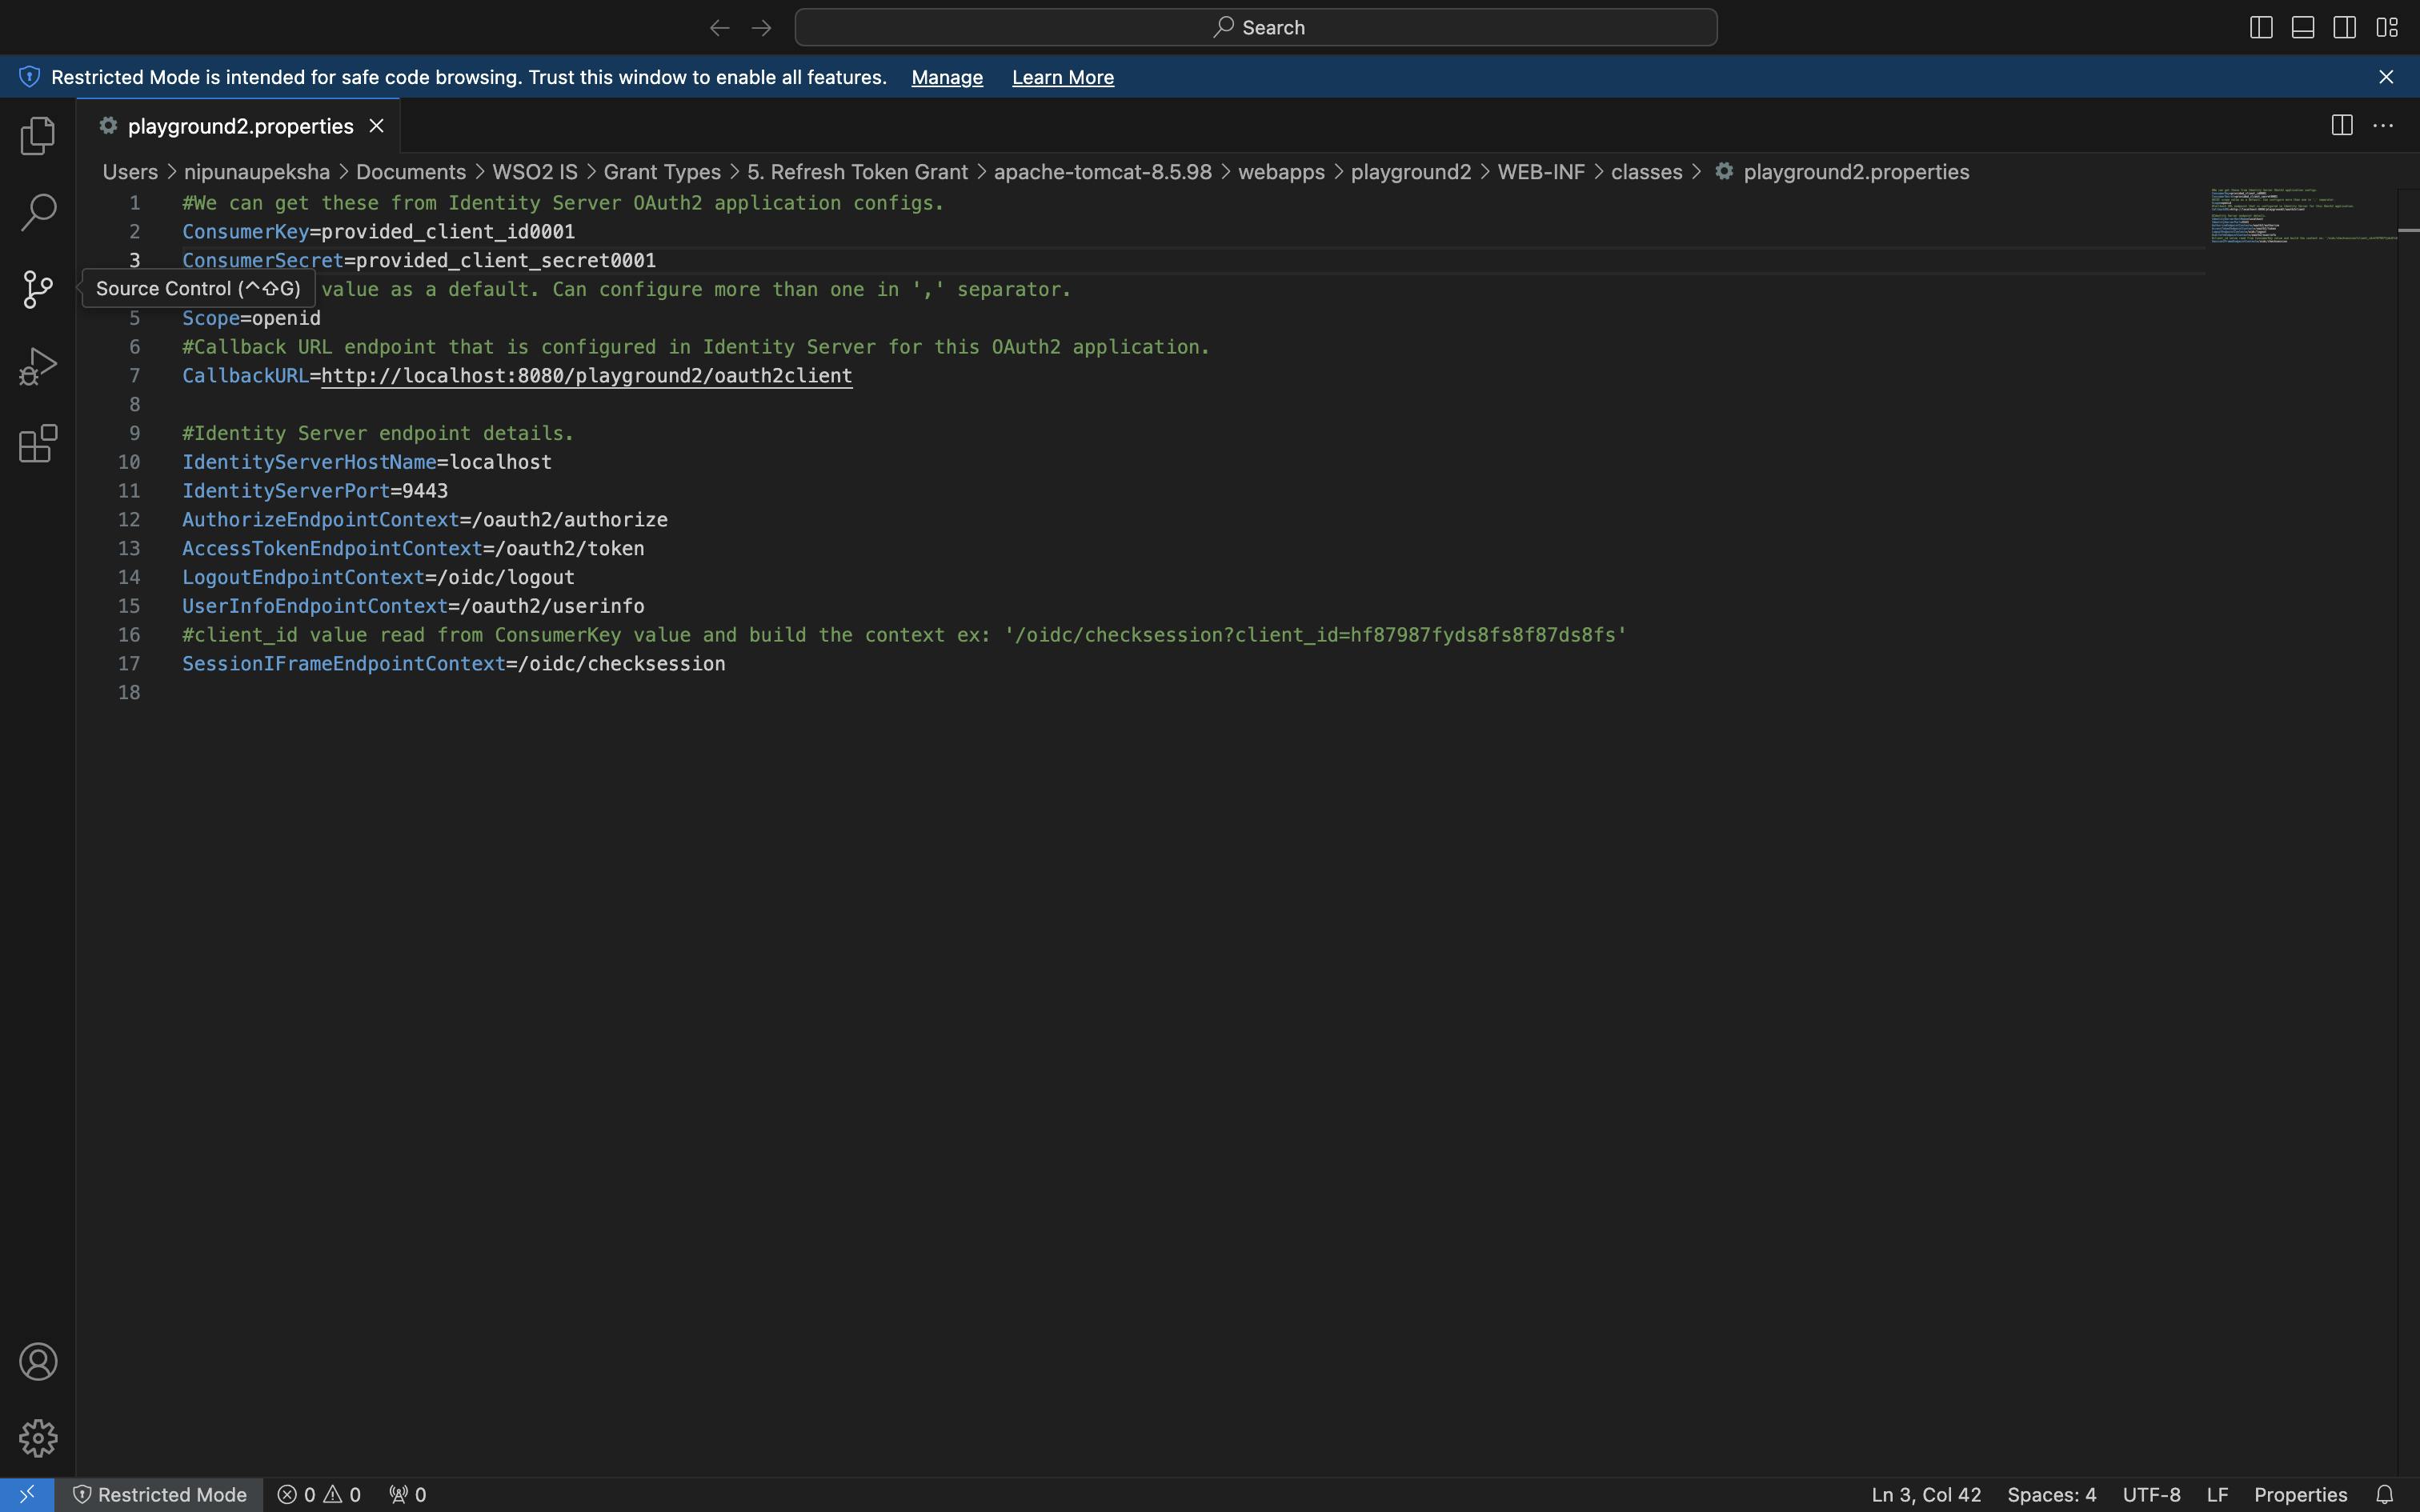
After starting the Tomcat server, you will notice there is a directory created in <TOMCAT_HOME>/webapps named playground2. Stop the Tomcat server by typing ./catalina.sh stop and go to <TOMCAT_HOME>/webapps/playground2/WEB-INF/classes and open playground2.properties file. Then provide the Client ID and Client Secret for the playground2 app(When we created the Service Provider(SP) using DCR we gave provided_client_id0001 as the Client ID and provided_client_secret0001 as the Client Secret). After that, start the Tomcat server again by typing ./catalina.sh start in the terminal.
If you want to see the logs of the Tomcat server, open another terminal tab and go to <TOMCAT_HOME>/logs and type, tail -1000f catalina.out
Since our SP is configured properly, we can use the Authorization Code Grant Flow to get an Authorization Code first. Type, the following URL in the browser and press enter to get the Authorization Code.
URL format
↳
https://<IS_HOST>:<IS_PORT>/oauth2/authorize?response_type=code&client_id=<CLIENT_ID>&scope=<SCOPES>&redirect_uri=<REDIRECT_URI>URL example
↳
https://localhost:9443/oauth2/authorize?response_type=code&client_id=provided_client_id0001&scope=openid&redirect_uri=http://localhost:8080/playground2/oauth2client
After getting the Authorization Code, run the following cURL command to get the Refresh Token along with an Access Token.
cURL format
↳
curl -v -X POST --basic -u <CLIENT-ID>:<CLIENT_SECRET> -H "Content-Type:application/x-www-form-urlencoded;charset=UTF-8" -k -d "grant_type=authorization_code&code=<AUTHORIZATION_CODE>&redirect_uri=<REDIRECT_URI>" https://localhost:9443/oauth2/tokencURL example
↳
curl -v -X POST --basic -u provided_client_id0001:provided_client_secret0001 -H "Content-Type:application/x-www-form-urlencoded;charset=UTF-8" -k -d "grant_type=authorization_code&code=954a2f49-5f0a-33b5-b0c4-d9f4ff0a2c45&redirect_uri=http://localhost:8080/playground2/oauth2client" https://localhost:9443/oauth2/token

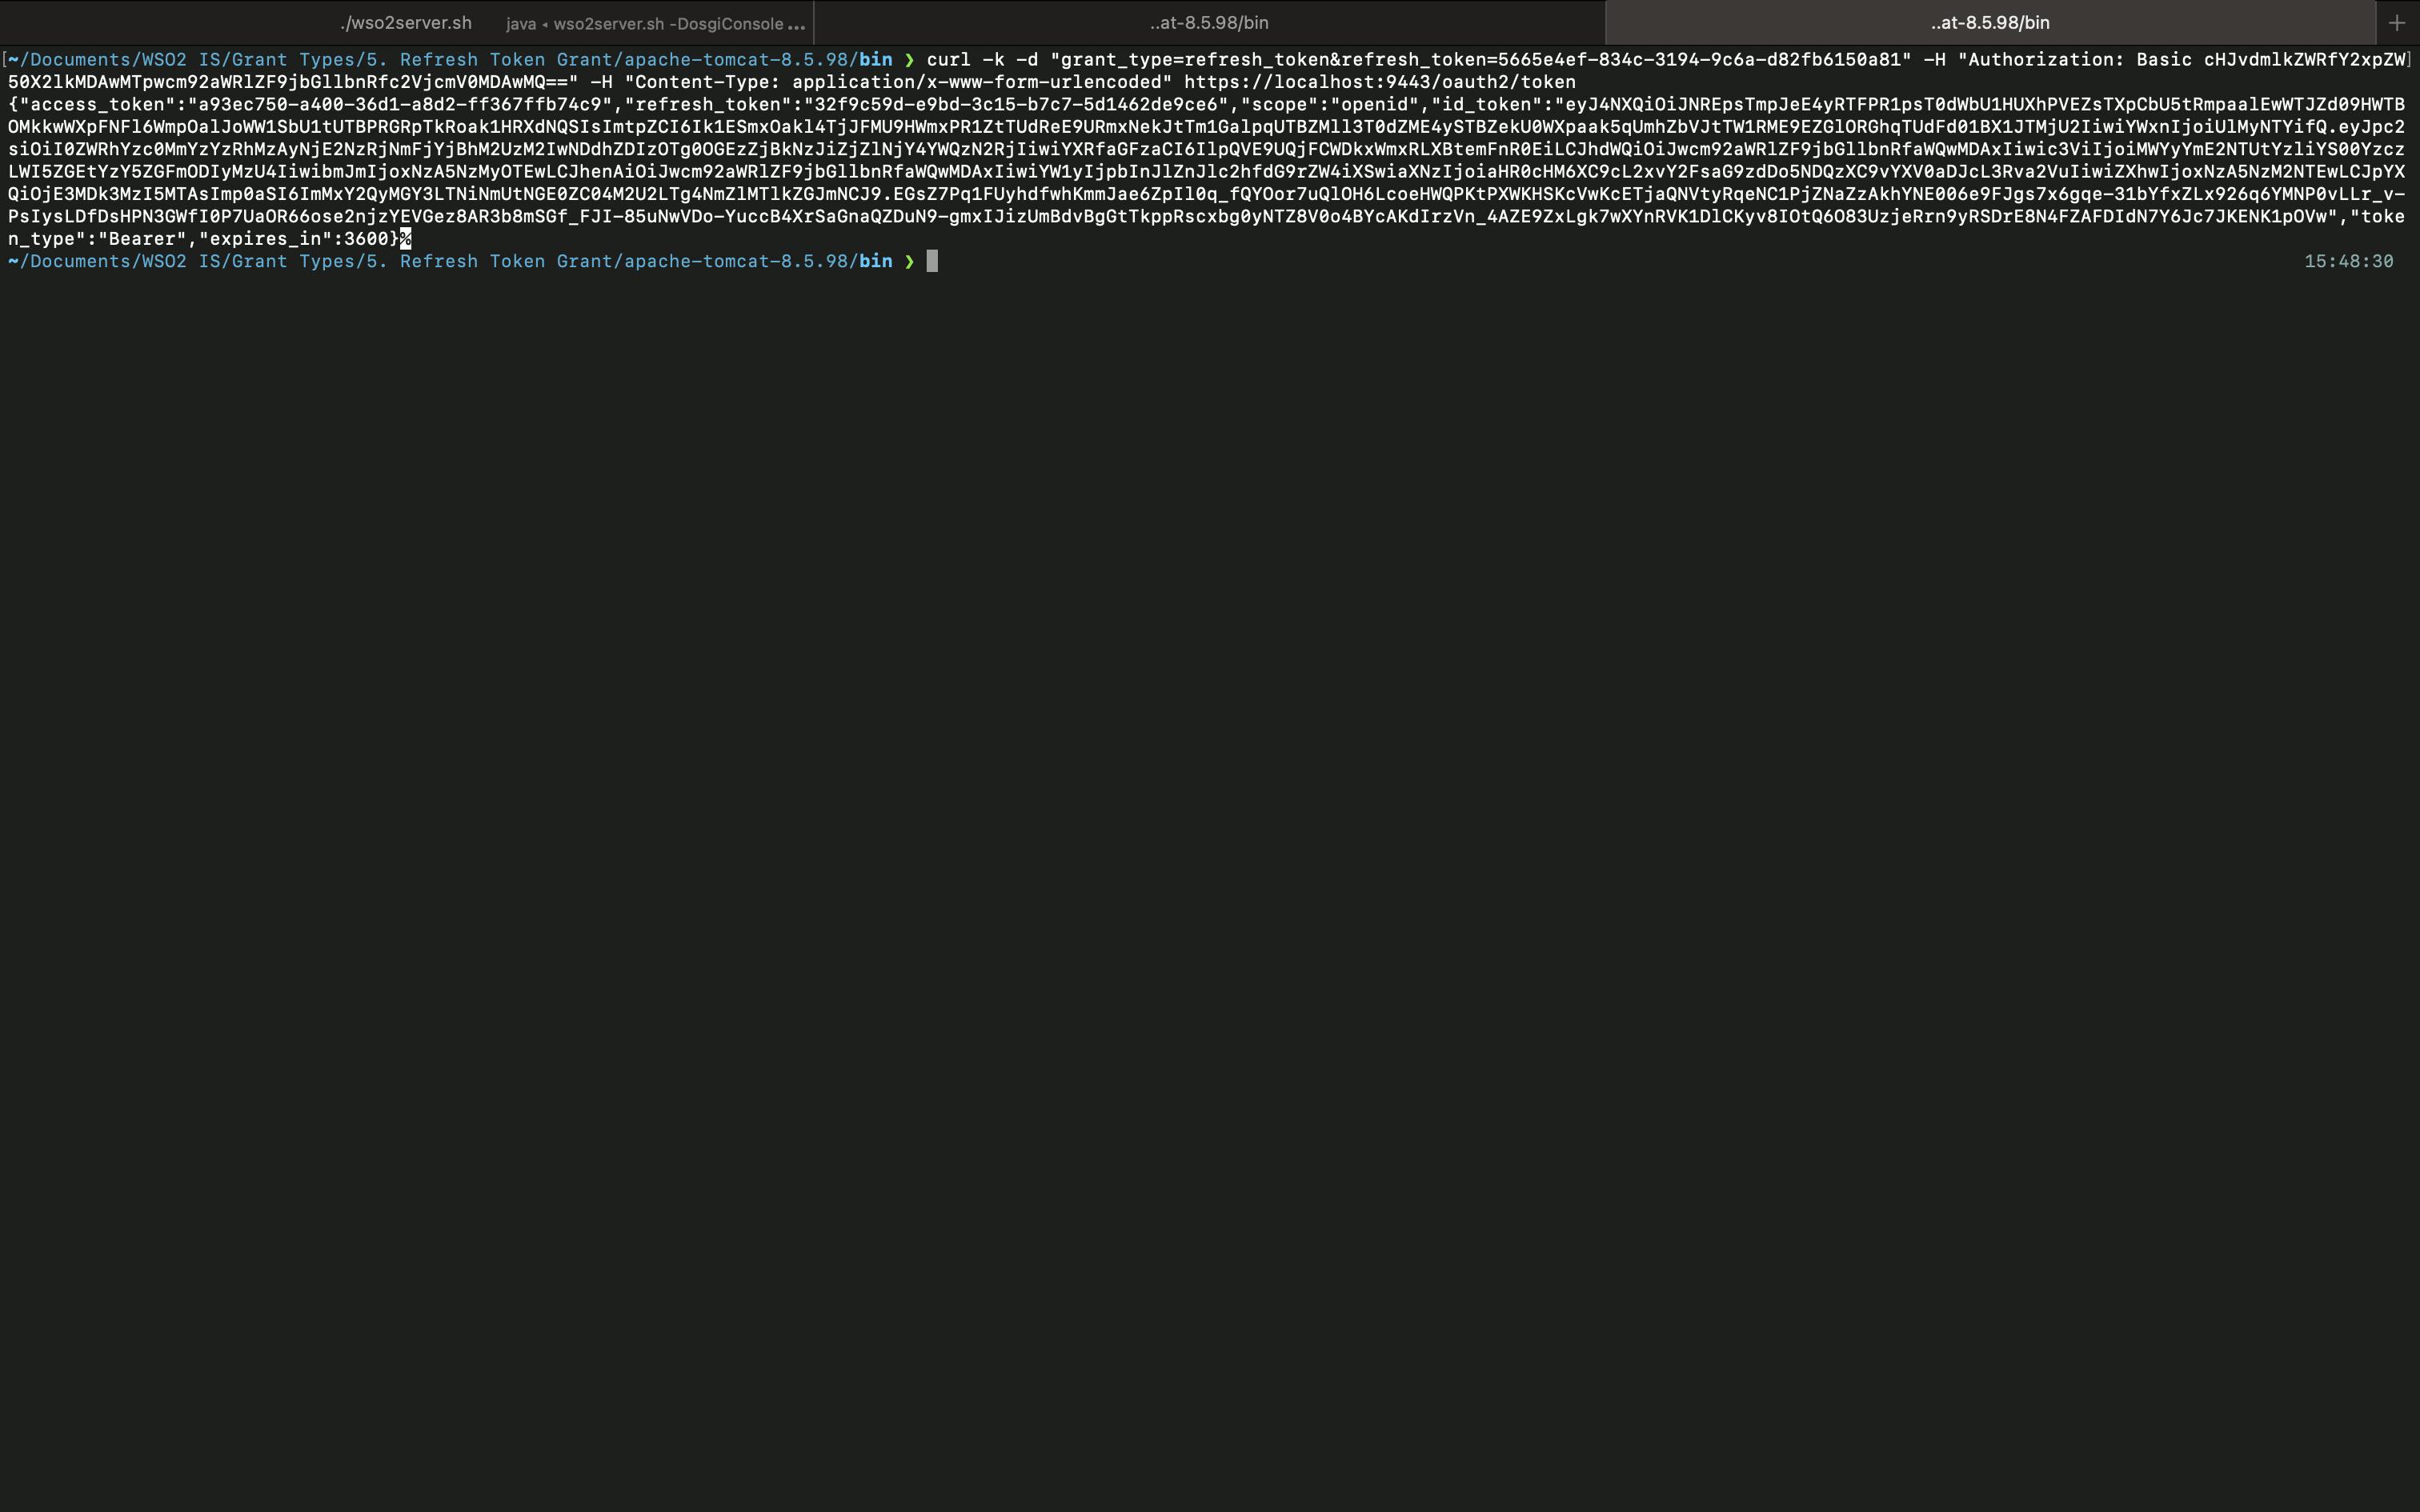
After getting the Refresh Token, you can request a new Access Token by executing the following cURL command.
cURL format
↳
curl -k -d "grant_type=refresh_token&refresh_token=<REFRESH_TOKEN>" -H "Authorization: Basic Base64Encoded(<CLIENT_ID>:<CLIENT_SECRET>)" -H "Content-Type: application/x-www-form-urlencoded" <TOKEN_ENDPONT>cURL example
↳
curl -k -d "grant_type=refresh_token&refresh_token=a2742e57-50a2-3618-b2ef-f68e7754313c" -H "Authorization: Basic cHJvdmlkZWRfY2xpZW50X2lkMDAwMTpwcm92aWRlZF9jbGllbnRfc2VjcmV0MDAwMQ==" -H "Content-Type: application/x-www-form-urlencoded" https://localhost:9443/oauth2/token
Since you are getting the initial Access Token with an ID Token you can access the /oauth2/userinfo endpoint to get user-info. Also, you can use the ID Token to get user claim values as well.
So this is it about the Refresh Token Grant. In the next article, we will look at how you can use the JWT Bearer Grant with WSO2 IS.